If you run WordPress websites, you'll spend a large proportion of your time backing up sites.
There are two main reasons you'll be backing up a site:
- One-time backups for doing updates, moving the website or improving the site
- Regular backups in case the server goes down, you accidentally delete something or the website gets hacked.
How to backup a WordPress site:
- Install a backup plugin like Duplicator, Backup Buddy or UpdraftPlus
- Click a button to create a new backup
- Wait for the backup to run
- Optionally download the backup files to your computer or upload to the cloud
The exact steps will depend on which plugin you're using. I'll go through some of the more common ones below, as well as how to backup a WordPress website manually.
If you just want to jump to the walkthrough, here are the links:
Which Plugin or Method Should You Use to Backup WordPress?
My favourite method for backing up WordPress, regardless of the situation, is with BackupBuddy. I've written a full tutorial on backing up and migrating a site with BackupBuddy here.
I've used BackupBuddy for years. It's stable, reliable and I can do both scheduled backups and one-time backups at the same time.
I also like that it's just one big zipped file containing everything, instead of other methods which break the files up.
Having said that, there are a number of situations I use other plugins.
I use Duplicator if I'm in a bit of a hurry and just need a one-time backup. I often use this if I'm brought in to consult on a WordPress website and they don't already have a backup solution set.
I always, always backup before doing any work on a client site. Then backup again after. Duplicator does the job efficiently and I've not had any plugin conflicts with it.
I use UpdraftPlus if I'm working on a client-of-a-client's site and they want regularly scheduled backups. I have a developer's license for BackupBuddy, but I don't really want to have to deal with the licensing of those sites if anything happened to my BackupBuddy license.
Note: BackupBuddy anonymizes your login in the database, so you don't need to worry about someone figuring it out.
I might also use UpdraftPlus if the site is huge and I need to do regular backups. This is when having the areas of the site split out can be an advantage.
Most systems have limits on how large an upload can be. Being easily able to upload multiple files is an advantage then. I would only really consider this if the full backups were pushing a Gigabyte.
Sometimes you have plugin compatibility issues, or you're dealing with a massive website, a complicated one, or just one where the plugins and themes haven't been updated in forever.
That's when I use a Manual Update.
I'll go through all four methods in this tutorial. I'll deal with the plugin methods first, because they're pretty similar in how they work, then do the manual one last.
How to backup a WordPress site with Duplicator
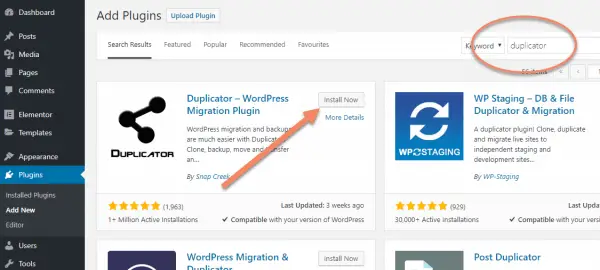
To backup a website with Duplicator, start by searching the plugin repository for "duplicator".
Install, then activate the Duplicator plugin, as shown.
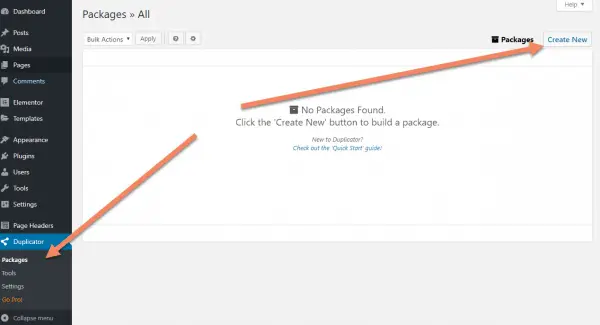
Once you have Duplicator installed and active, navigate to Packages in the sidebar menu, then click "Create New" to start the process.
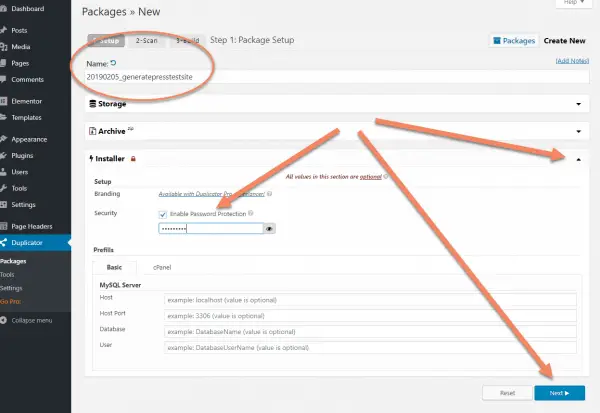
Choose a name for this save. This will be the name of the zip file that Duplicator generates.
The default name will usually be fine. I've noticed that sometimes the date is wrong if you've done a few backups. Just click the blue "refresh" icon next to Name.
The name is the date in Year, Month, Day format, followed by the name of the site.
When you get to this screen, the Installer accordion will be closed. Just click the arrow to expand it, check Enable Password Protection and put in a password that you'll remember.
Once you're done, click "Next".
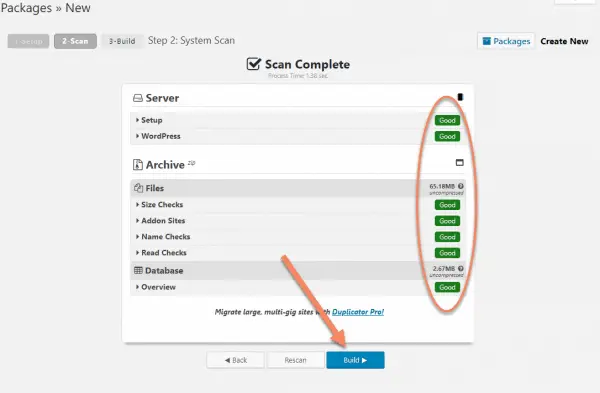
Duplicator will check your settings and files and let you know if there are potential problems.
Common problems are a low PHP version (see this tutorial for how to fix that) or not enough memory (see here for the fix).
The other issue I sometimes see is files with unusual character names (usually because of non-English words) or files that are too big. If you see these problems, you can click the arrow next to them to expand the relevant accordion.
Duplicator will show you what files it thinks might be problematic. You can just uncheck them to exclude them from the Package if you like.
If you make changes on this screen, you should click "Rescan" to analyze the changes.
You might also be prompted to check a box confirming you're aware of the potential issues and want to proceed anyway.
The only risk I've ever come across is that the backup fails and you try again.
Once everything is fine, click "Build".
Duplicator will take a minute or more to get everything ready and make the backup.
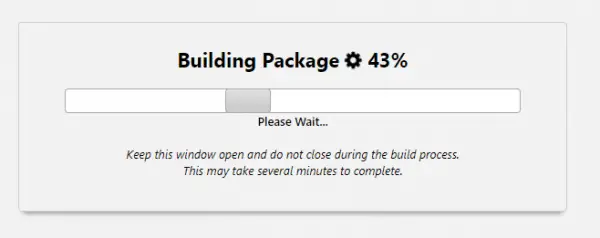
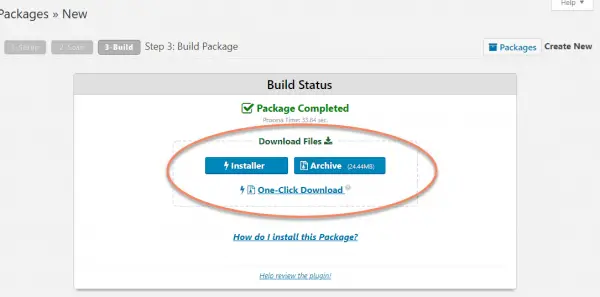
Once you see Package Completed, the process is complete.
Download the two files by clicking One-Click Download. You should get two consecutive save prompts, or see that both files have downloaded.
Sometimes my browser blocks downloading of the second file, so you just have to click the button for the file that didn't save.
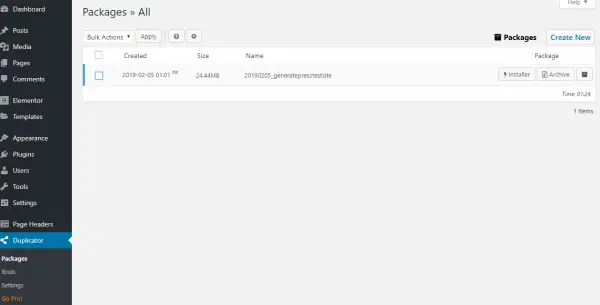
If you ever need to download a previous backup, just navigate to Packages and they'll all be listed there.
You can also bulk delete any and all packages by selecting them, choosing Delete from the dropdown (where you see Bulk Actions), then clicking "Apply".
That's all there is to making a backup with Duplicator.
How to backup a WordPress site with BackupBuddy
As a premium plugin, installing BackupBuddy is a little different. You also have to enter your license so that it will update.
How to install and configure BackupBuddy
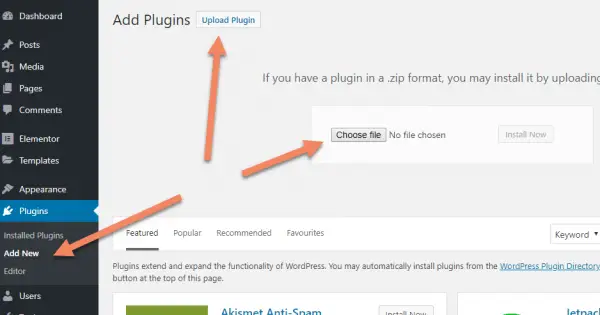
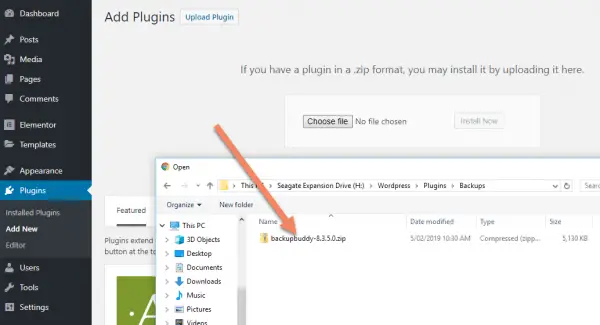
Navigate to Add New Plugins, but instead of searching in the store, click "Upload Plugin".
Click "Choose file".
You'll be prompted to find your BackupBuddy file. Double click that.
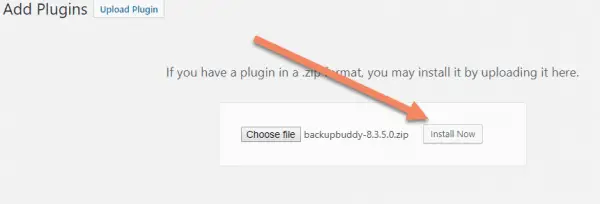
Click "Install Now".
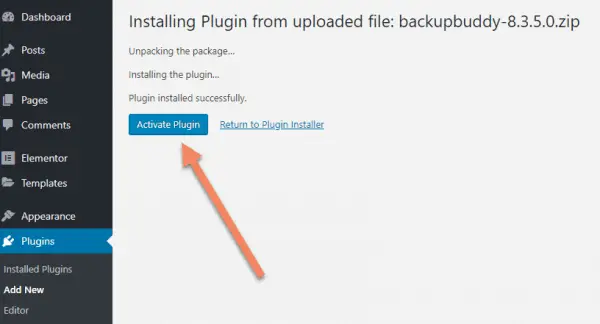
Once BackupBuddy is uploaded and installed, you'll see this screen. It can take a few minutes if you're on a slow connection.
Click "Activate Plugin".
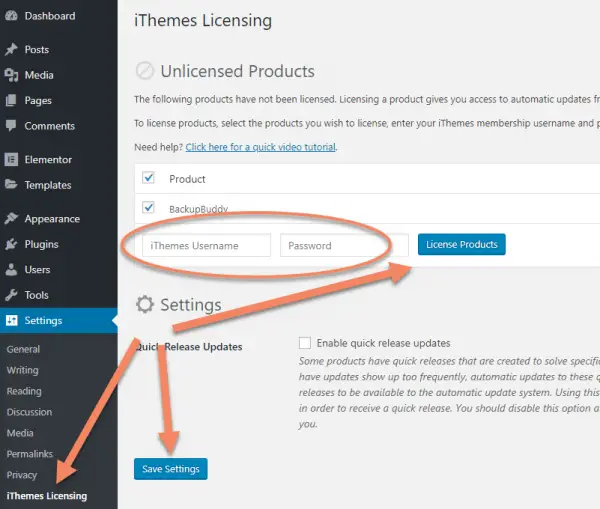
Navigate to iThemes Licensing under Settings in the sidebar.
Enter your iThemes login details into the fields where shown. If you forget your password, you can go to iThemes.com and reset your password.
I don't usually check Enable quick release updates. You might if you leave your sites unattended for weeks at a time, but I prefer to do updates manually.
Click "License Products".
Assuming your login was good, you'll see Successfully licensed BackupBuddy.
I've checked the database, and it seems BackupBuddy only stores a hash of your password, not the password itself. Basically, it looks like no one can use the WordPress installation or the database to pull your iThemes login details.
That's a nice touch, and something one would expect from a company that has developed one of the most popular WordPress security plugins.

We've still got a bit to setup first.
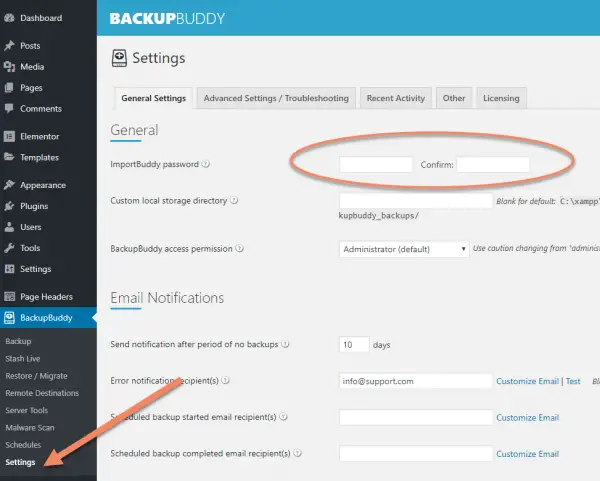
Navigate to Settings under BackupBuddy. You shouldn't need to worry about any of the tabs other than General Settings.
Put a password into the ImportBuddy password fields. This will be used if you ever need to migrate the site. I go into more detail about how it's used in the tutorial on migrating with BackupBuddy here.
Make sure the ImportBuddy password is something you'll easily remember months from now.
You probably don't need to touch any other fields in this screenshot.
Scroll down and you'll see File & Directory Defaults.
Sometimes you'll have large files that don't change and you don't care to include in the backups. These might be big videos files or PDFs.
If you have any such files that you don't want to include in the backups, find them by clicking through the folders til you see them.
As you hover over files or folders, you'll see a red icon with a minus sign in a circle. Clicking that icon will add that path in the box to the right.
Be careful excluding things, especially folders. For example, if you exclude the wp-content folder, none of the files that actually matter will be backed up.
You shouldn't need to click Active Plugins Only, because you shouldn't have any inactive plugins that you aren't intending to keep.
When you're done, click "Save General Settings".

That concludes installing and configuring BackupBuddy.
How to create a WordPress backup with BackupBuddy
There are currently 5 different styles of backup you could choose from with BackupBuddy.
By far the most common ones you'll use are Database Only and Complete Backup. The others are useful if you're only working in those folders. That's going to be pretty rare.
Let's walk through a Complete Backup.
Click Complete Backup.

BackupBuddy will pull in the database, zip the files, make sure everything is ok, then let you know.
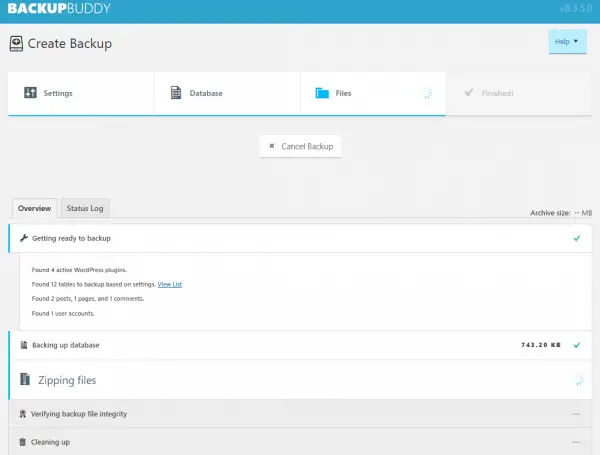
Sometimes it gets stuck. Clicking the Status Log tab should give you an idea on what's causing the issue.
If BackupBuddy gets stuck, most of the time I find it's because your server doesn't have enough memory (see this tutorial on how to fix memory problems here) or there's a file that's too big.
If you have an oversized file causing a problem, try the backup again, but this time, before clicking Complete Backup, click the gears icon next to it.
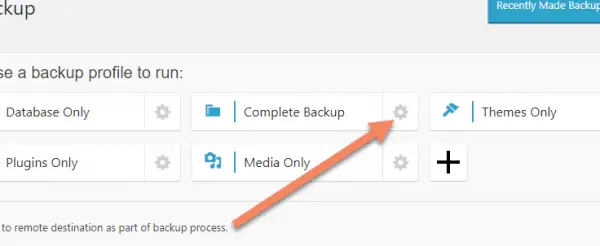
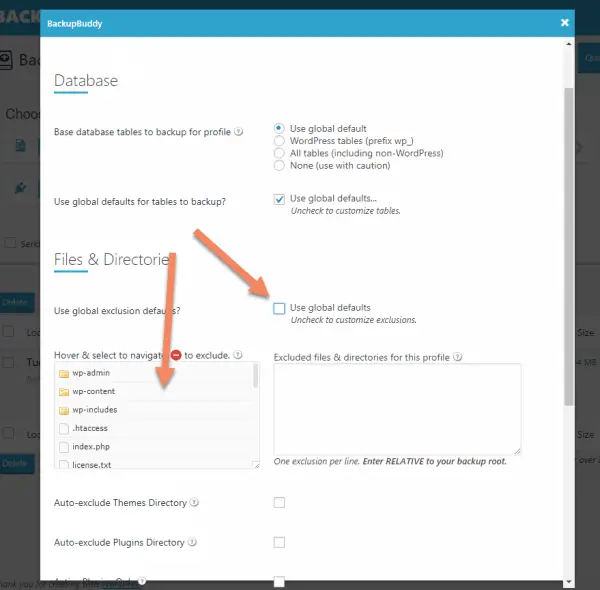
Unchecking the Use global defaults checkbox will allow you to exclude any files just for this backup.
This won't affect the global settings, but you might want to go back later and change them to match. Just so you don't have any problems next time you try to backup.
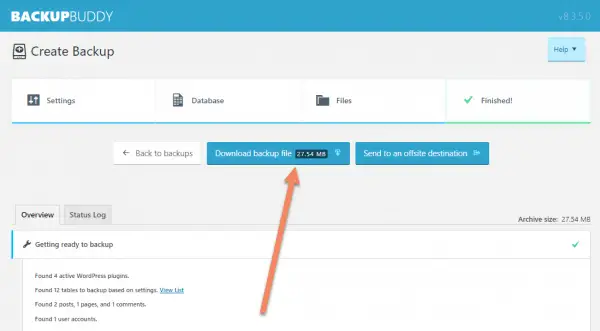
Once the backup process has finished running, you'll see a "Download backup file" button.
Click that to download the zipped file to your computer.
We'll setup an offsite destination later, but if you've already got one setup, you could click "Send to an offsite destination" instead.
Choose where to save your zip file.
This zip file will contain all the files from the server, as well as an sql file copy of the database.
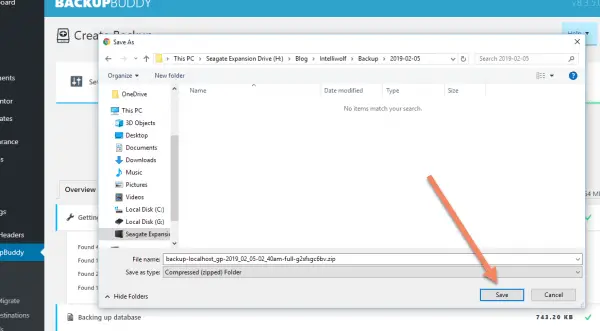
If you ever need "just one file", you can unzip this backup file and it will be there.
How to schedule regular backups with BackupBuddy
The other way we use BackupBuddy is to schedule regular backups.
I like to do weekly complete backups and daily database backups.
I also like to send them to an offsite server (Amazon S3 by choice).
The purpose of these scheduled backups is in case the server ever goes down or gets corrupted, or your site gets hacked and defaced.
If that happens and you've got regular backups, you just pull up the latest backup, restore the site to the new hosting, and suffer minimal lost time.
If you didn't have the backups, or you didn't take them regularly, you'd have to rewrite everything from scratch.
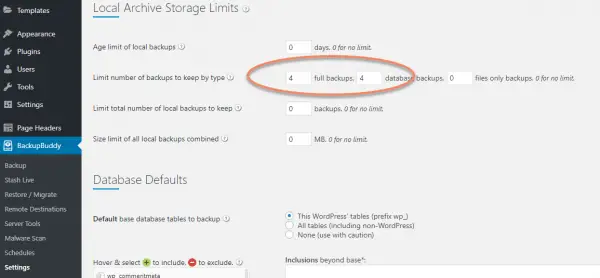
Navigate to Settings under BackupBuddy.
Scroll down to Local Archive Storage Limits. I like to limit the number of local backups to 4 full backups and 4 database backups.
This will just apply to the backups stored on this site. If you're automatically sending the backups to Amazon S3, you don't need to keep a lot of backups on your server, taking up space.
Click "Save General Settings" when you're done.
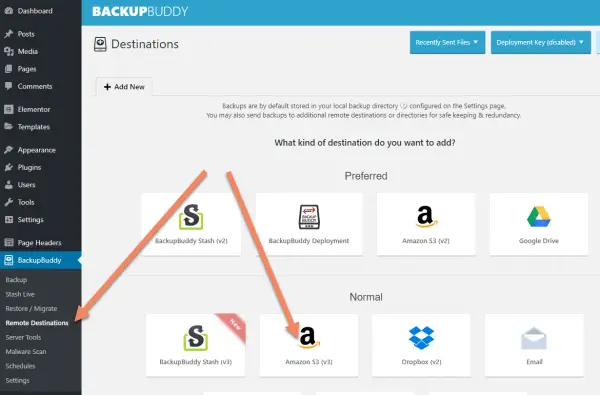
I like using Amazon S3 for my offsite backups, but you might prefer Google Drive or Dropbox.
Let's setup Amazon S3 for use as a remote destination for BackupBuddy backups.
Click Amazon S3 (v3).
Fill out your Amazon S3 credentials.
Don't use your master Amazon S3 Access Key here.
I've got a whole tutorial on how to setup a Amazon S3 user permissions for use in backups here.
I highly recommend you go through that process first, then pick this tutorial back up.
The Amazon Access Key ID and AWS Secret Key are stored in plaintext in the WordPress database (under wp_options->pb_backupbuddy if you wanted to check).
Anyone with access and malicious intentions could pull your login from the database and compromise anything you had in your S3 account.
Amazon has a mechanism that will protect you from that, using Identity and Access Management (IAM). I can't emphasize strongly enough how much you should take advantage of that.
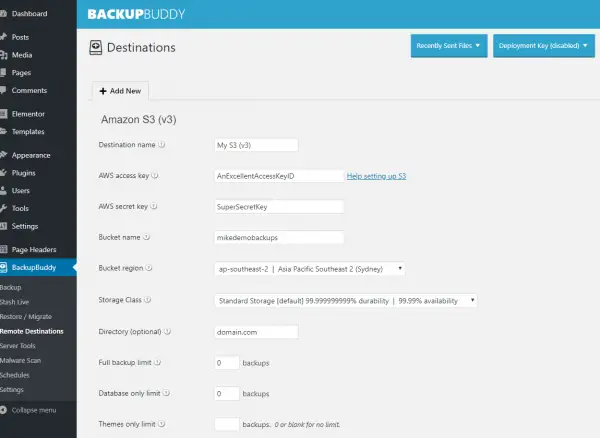
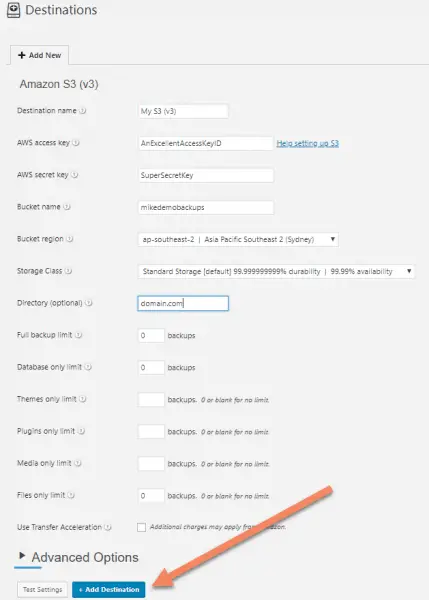
Set any backup limits to zero. You don't want the plugin to manage cleanup of your Amazon S3 backups.
Indeed, if you've set your permissions the way I showed, the plugin won't be able to delete the files. I haven't tested, but I imagine trying to delete files without permission to do so could cause BackupBuddy to get stuck.
Click "Test Settings" to make sure you've set everything up correctly.
If that's ok, click "Add Destination".
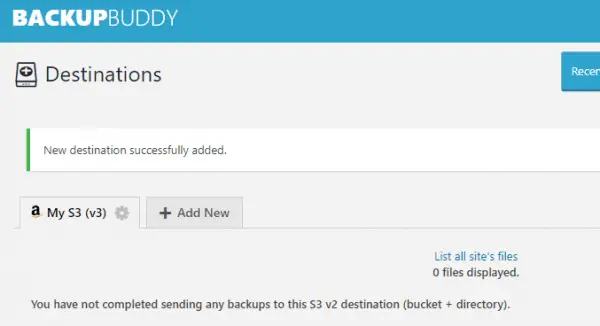
You'll see a confirmation that Amazon S3 was successfully added.
If you ever need to change the settings, come back to this page, click the gears icon next to Amazon S3 and change it from there.
Now that we've setup the remote destination, it's time to add the schedules.
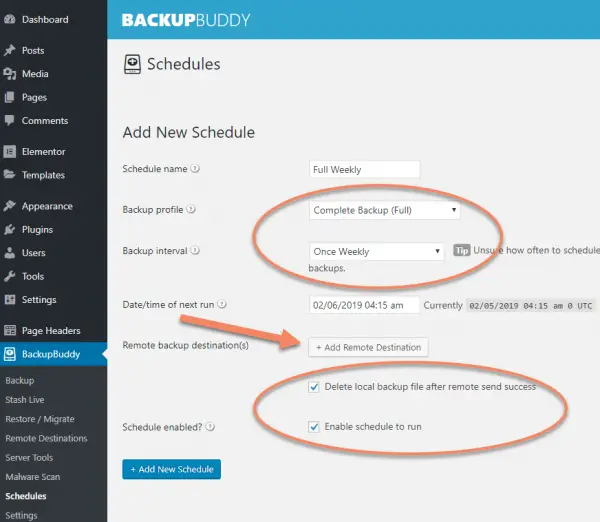
We'll be adding a weekly complete backup and a daily database backup.
If you are setting up a more static type of site (like a basic business site) that rarely changes, you might choose to do the full backup monthly and the database backup weekly.
Use the schedules that best suit your site.
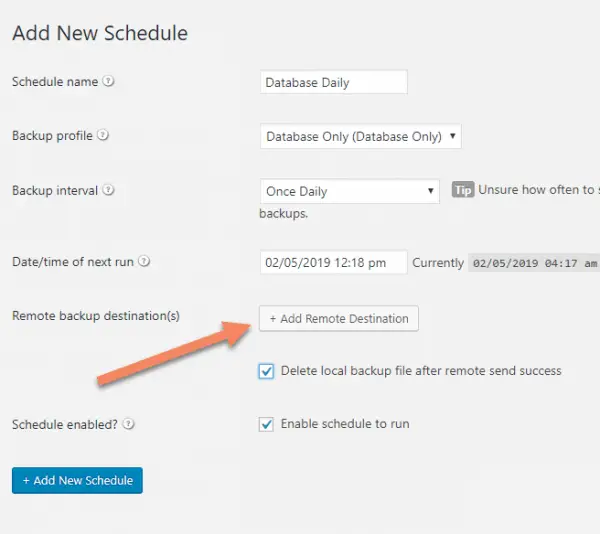
I like to check Delete local backup file after remote send success. But if you're at all worried, leave this unchecked until you see it's working.
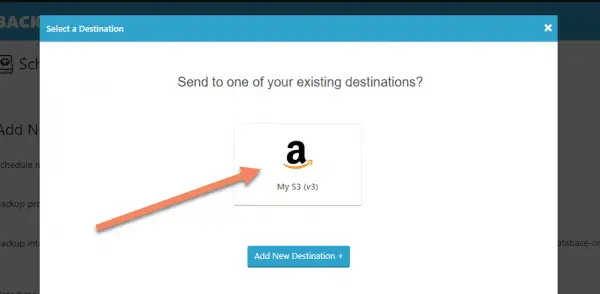
Click "Add Remote Destination".
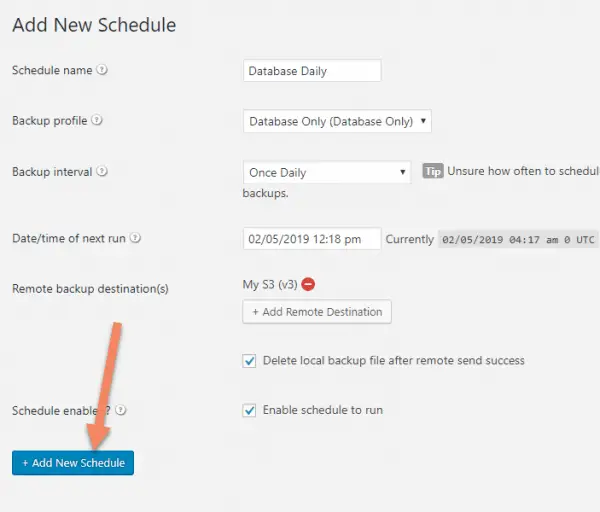
You'll see a popup with the remote destinations you've setup. On this site, we only have the one Amazon S3 account. Click that.
When you're happy with the settings, click "Add New Schedule".
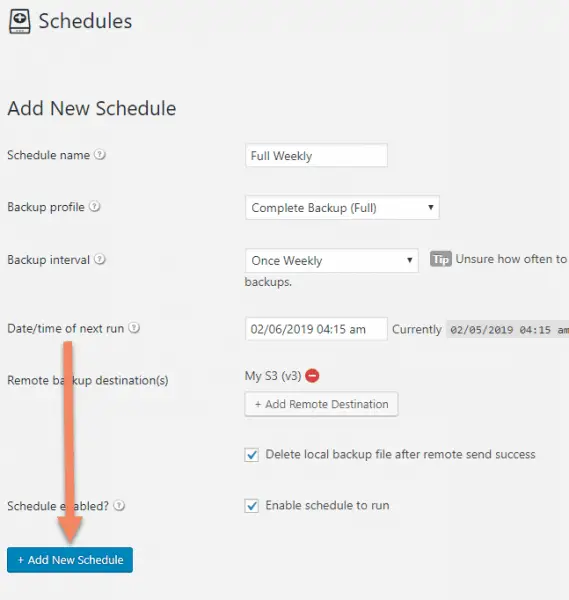
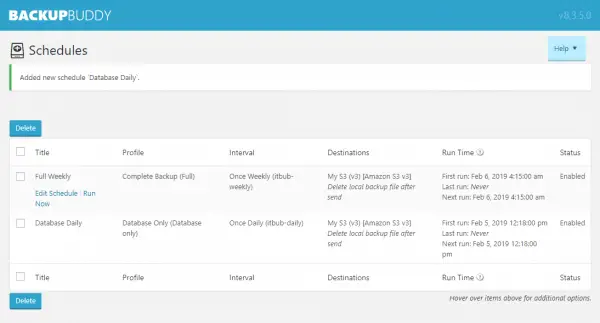
You'll see confirmation that the schedule was added.

Next up is the daily database backup.
When I got to this screen, it didn't have the date of the next run already filled in. Just click the field, which will popup a calendar. Click "Now".
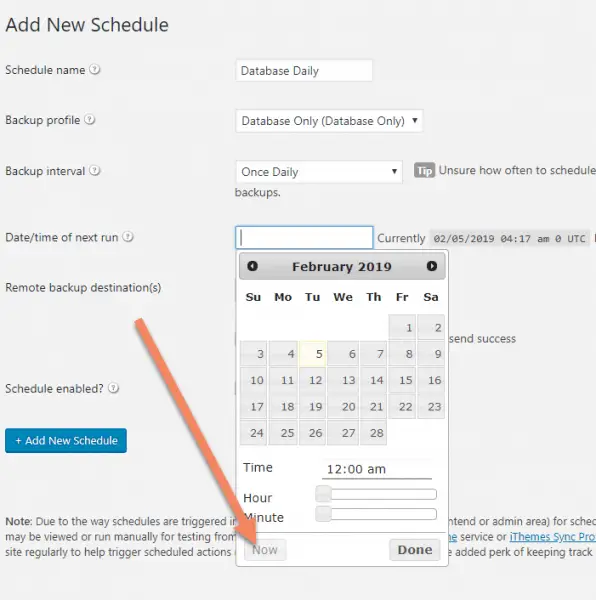
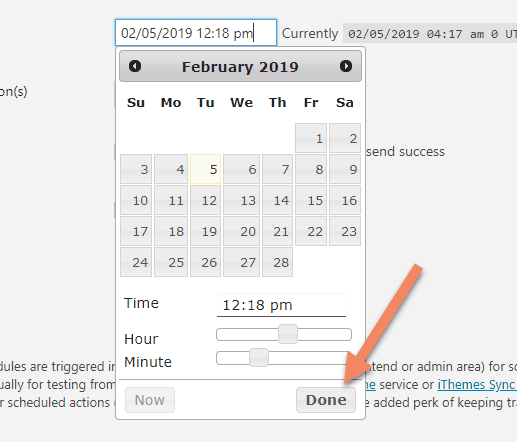
This will fill in the current date and time. You can change it to a time of day when you have fewer visitors if you like.
Click "Done".
Fill in the rest of the schedule details, then click "Add Remote Destination".
Again, choose where you want to send the backup.
When you're finished, click "Add New Schedule".
You'll see confirmation that the schedule was added.
If you ever want to edit the schedule or change the details, come back to this page.
How to backup a WordPress site with UpdraftPlus
UpdraftPlus is a great, free alternative to BackupBuddy.
Its best features, in my opinion are being able to schedule backups as well as send them to an offsite destination like Amazon S3.
The only thing that annoys me about it is that it takes a lot longer to download each file individually. That's probably because of the integrity checks Chrome has to do, because it's not a download speed issue.
It's also just one more thing to make sure you have all the files, rather than just a single file.
You don't need the pro version of UpdraftPlus for this.
How to install and setup UpdraftPlus
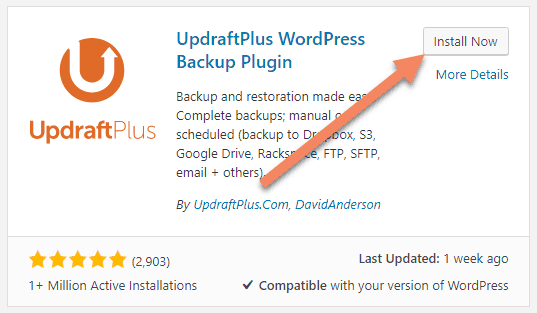
To get started installing UpdraftPlus, go to Add New Plugin, then search for "updraft". The one pictured should show up first.
Install and activate it.
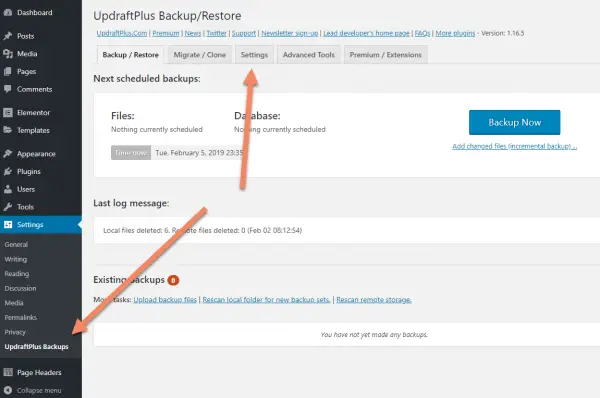
Once UpdraftPlus is active, navigate to UpdraftPlus Backups under Settings.
Click on the Settings tab.
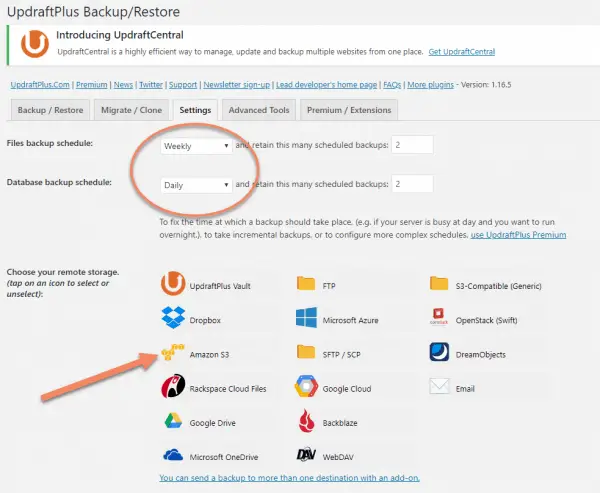
The backup schedules default to "Manual". I like to set Files backup schedule to "Weekly" and Database backup schedule to "Daily" for most sites.
There are some other options, just do what works best for how you intend to use the website.
Next we'll setup Amazon S3 as the remote destination.
If you don't want to send your backups offsite, just skip this section.
Click Amazon S3.
You'll see an area to input your Amazon S3 credentials.
Never put your master Amazon credentials in this area, even if it's your website. The keys are stored in plaintext in the database, so if someone hacks your site they will gain full access to all your Amazon S3 files. Always use IAM with correct permissions set.
I've written a full tutorial on how to restrict access to Amazon S3 for WordPress backups with IAM, which you can go through here.
Once you've filled in the details, click "Test S3 Settings".

If everything's good, you'll see a success popup.

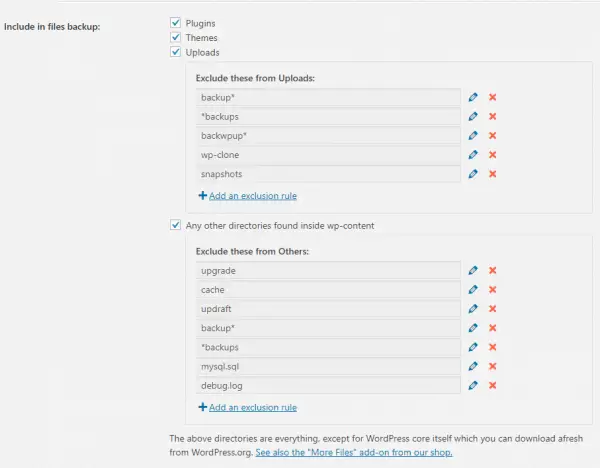
Scrolling down, you can exclude particular files or areas. I usually just leave these as default.
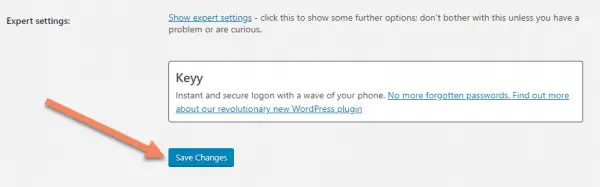
Scroll to the bottom and click "Save Changes".
How to do a standard backup with UpdraftPlus
In UpdraftPlus Backups, in the Backup / Restore tab, click "Backup Now".
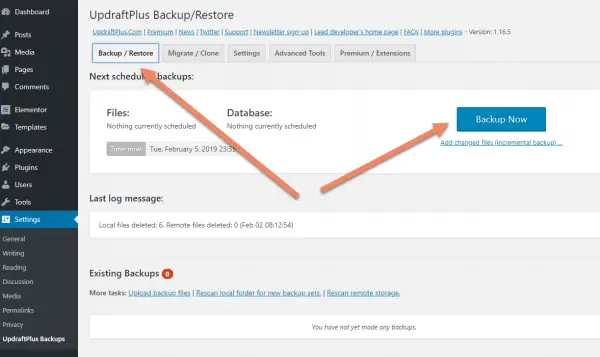
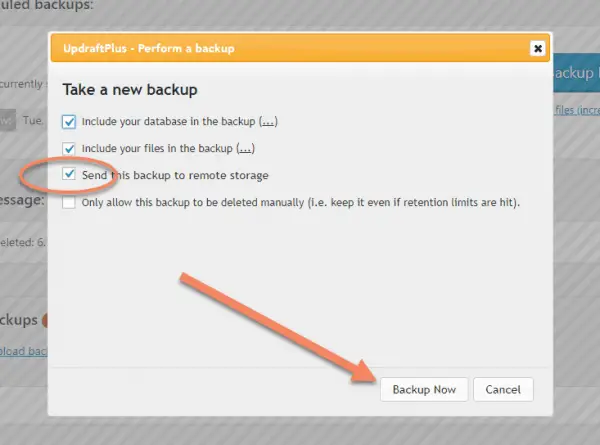
You'll get a popup with options for this backup.
If you just want a database backup, or just a files backup, uncheck the checkbox next to the other option.
Uncheck Send this backup to remote storage if you want to keep it locally.
If you send the backup to the remote destination, when you go to save the files to your server later, it will actually request them from the remote destination, not from your local server, as you might intuitively think.
If this is an important backup (maybe the first backup of the site after it goes live), you might want to check Only allow this backup to be deleted manually.
Click "Backup Now".
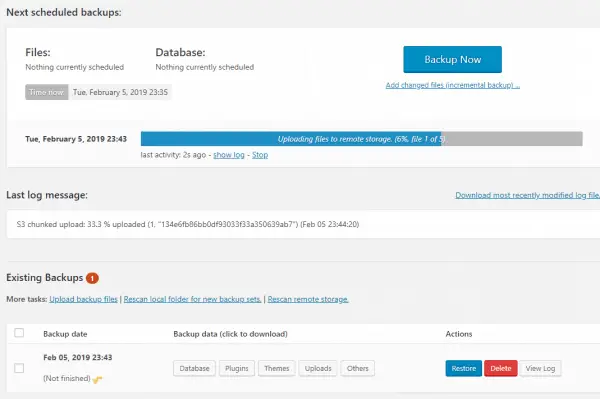
UpdraftPlus will go and do all its checks, then compress the files and folders.

If the backup is going to the remote destination, it will be automatically sent now, as you see.
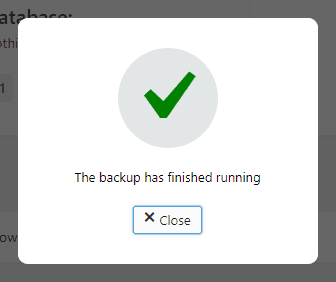
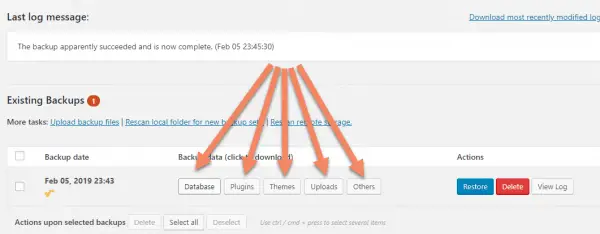
Once UpdraftPlus has finished running the backup, you'll see a popup confirmation that disappears after a few seconds.
If you want to download the backup to your computer, you'll need to click each of the buttons for Database, Plugins, Themes, Uploads and Others.
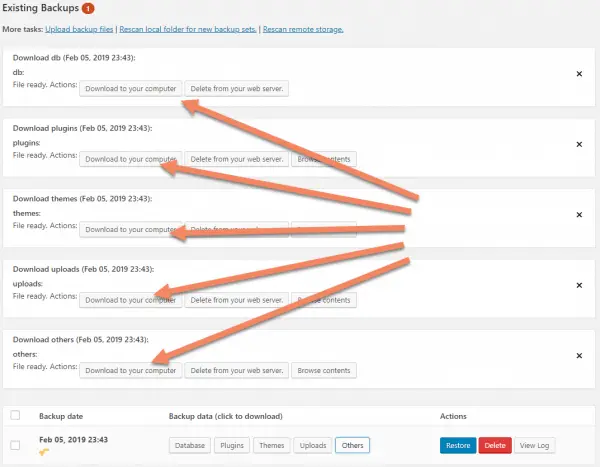
This is the same process if you want to download a backup that was scheduled.
It will take a few seconds to load each of them.
You'll see a list of the files ready to be downloaded.
Click each of them to download to your computer.
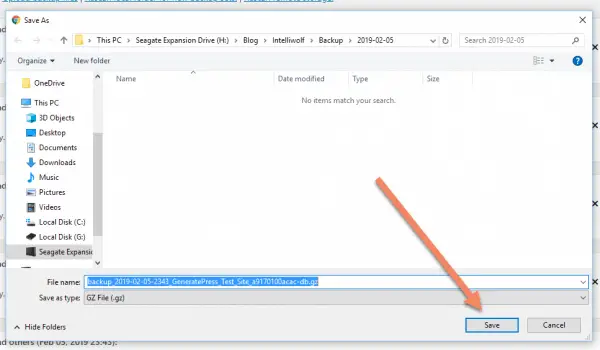
I find I can only download them sequentially, for some reason. It won't let me download the files in parallel.
Find your download folder, then click "Save".
This completes the process for backing up with UpdraftPlus.
How to Manually backup a WordPress Website
Everyone who runs a WordPress site should know how to do a manual backup.
Most of the time, you'll use plugins.
Sometimes there are compatibility issues with backup plugins. Other times you'll need to do a manual backup if the site is massive, or you can't get into the WordPress admin area.
I'll run through how to do a manual WordPress backup using cPanel on HostGator, but the process is the same, no matter what system you are using.
How to manually backup a WordPress website:
- Export the MySQL database and save it to your computer
- (Optionally) Zip the files on the server
- Download the files from the server to your computer
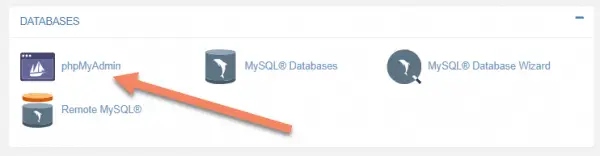
In cPanel, find phpMyAdmin under Databases. Click it to launch phpMyAdmin in a new tab.
In the sidebar, click the database for this site. Depending on your setup, you might have a few databases here.
If you aren't sure which database you need, you can check in the wp-config.php file.
The other way to check if you're in the right database is:
- Click on the database in the sidebar
- Click on wp_options (the "wp" might be something else)
- The first row of the table will have the website url
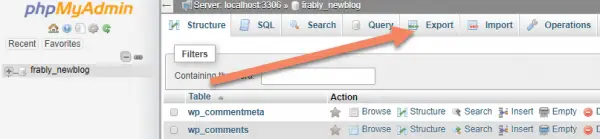
Leave all of the tables unchecked.
Assuming you're in the correct table, click Export.
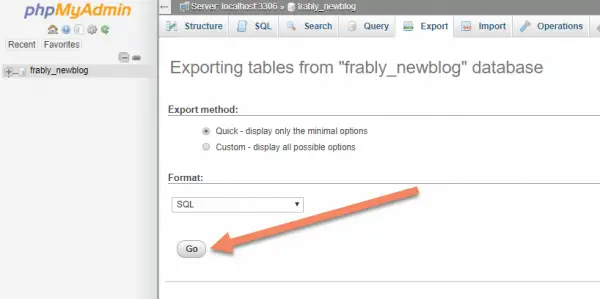
You can choose different formats. Sometimes I do a Custom export method so I can zip the database. You have to be careful with that, because it defaults to 50,000 entries per table. That's usually problematic on a large site or an eCommerce site.
Click "Go".
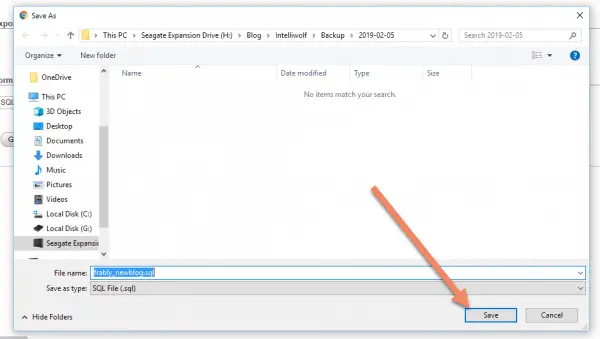
Save the database file to your backups folder for that date.
If you wanted to see inside this file, open it with Notepad or Notepad++. It's just a text based file filled with SQL (Structured Query Language). You should be able to make sense of much of it, even without knowing SQL.
That's it for the database. Next we need to download the files.
You could do this with FTP, but I prefer to do it through cPanel.
The main reason is that you can't zip files through FTP. If you don't zip the files, you have to download them one-by-one, which is exponentially slower than compressing them and transferring the zipped file.
So that's what we're going to do.
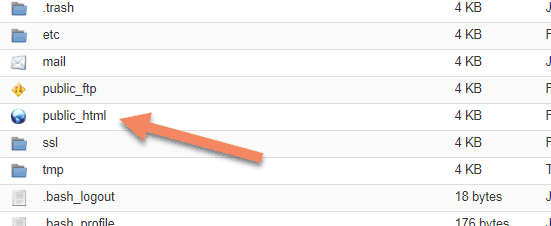
In cPanel, navigate to File Manager.
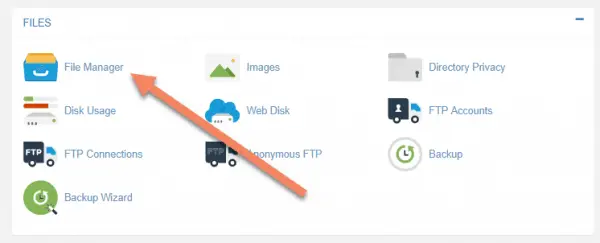
Go to into your public folder. This is where the /wp-admin/ folder is stored.
You'll usually find it in public_html, but if you have several domains on that host it will likely be in a subfolder somewhere.
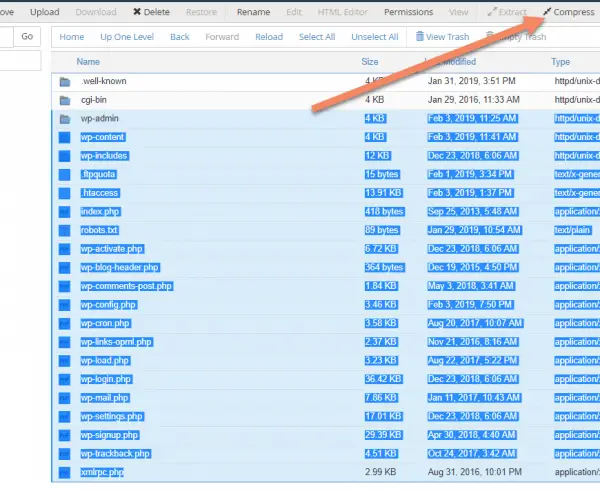
Select all the files and folders by clicking the first, then holding CTRL or CMD and clicking the last.
Click Compress in the top menu.
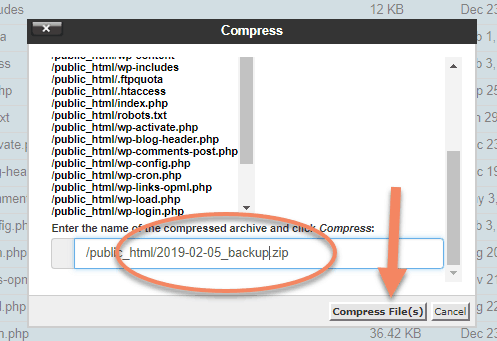
Select Zip Archive. You can do one of the others if you know what you're doing and understand the different ways groups of files are compressed.
Honestly, it doesn't make much of a difference in size for what we're doing, so I just stick to Zip Archive.

Scroll down to the bottom of that popup. You'll want to change the last part of the file name to something that includes the date.
Click Compress File(s).
File Manager will go through all the files and folders you selected and turn them into one zip file.
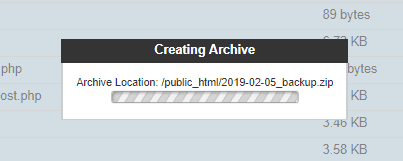
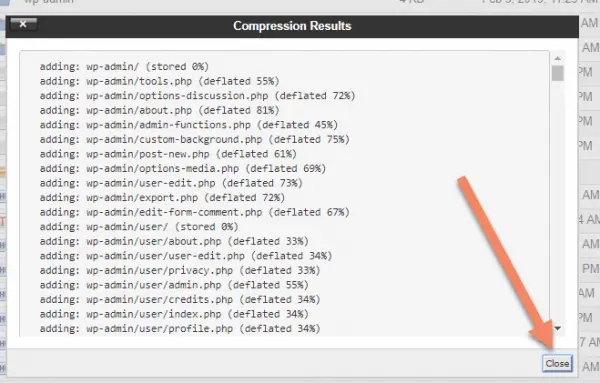
Once the process has finished running, you'll see a popup listing all the files and how much they were compressed. Invigorating reading, I'm sure.
Click "Close".
Find the zip file you just created. Click it so it's highlighted, then click Download.
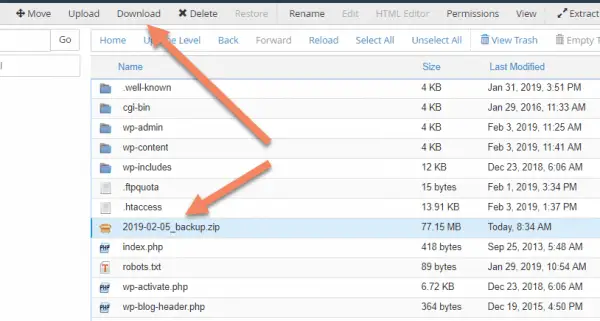
Save the zip file to the same place as the SQL file.

And that's all there is to it.
I hope you've found this tutorial on how to backup WordPress useful.

This was perfect!!
Great Overview AND Tutorial!
Thank you!