When you start getting serious about building WordPress websites, you'll want to start developing on your own computer. It's a lot faster, you can do it offline (at the beach like the promo shots for those "lifestyle gurus"), and you don't have to worry about making mistakes.
Many premium plugins, that otherwise limit the number of installations, will allow you unlimited installs on your local computer setup.
We'll be building a WordPress installation that is exactly the same as a live website. The only difference is that it's only accessible from your computer.
I've covered installing XAMPP on your Mac or PC in another tutorial. If you don't already have it setup, go through that tutorial first.
How to install WordPress in XAMPP from scratch:
- Make sure XAMPP Control is running
- Create a new database
- Create a folder in /xampp/htdocs/
- Download WordPress to the folder
- Go to http://localhost/[folder]/wp-admin/ and run the 5 Minute Installer
How to install WordPress in XAMPP from a backup:
- Make sure XAMPP Control is running
- Create a new database
- Create a folder in /xampp/htdocs/
- Make a backup of the existing site
- Copy the backup files into the folder
- Follow the steps for the specific backup
As you can see, the first three steps are the same, regardless of whether you are creating a fresh WordPress installation or restoring from a backup.
If you're using an import-style backup like All-In-One WP Migration, you need to follow the steps for installing WordPress from scratch. Then you proceed with the import from inside the WordPress installation.
Let's go through the first three steps.
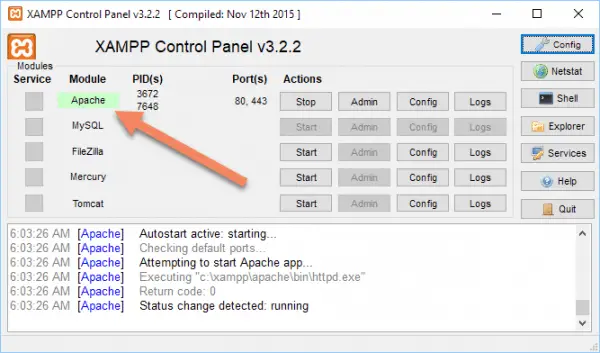
Make sure XAMPP Control is running
The number of times I've forgotten this step...
You have to make sure XAMPP Control is open (it can be minimized) and Apache is running.
It looks like this on Mac:
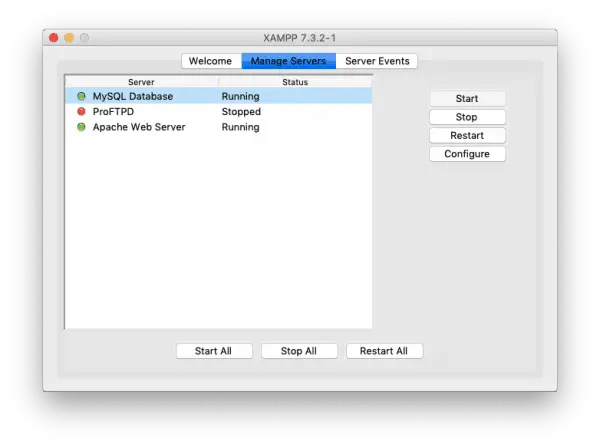
You might need to start MySQL too, if you have the default install.
I use MariaDB for my database and access it with HeidiSQL, instead of the default XAMPP setup of PHPMyAdmin. That's more a matter of personal preference than anything else.
If you're not doing a lot of development, then just stick with the default XAMPP setup.
Create a new database
Process for PHPMyAdmin (standard install)
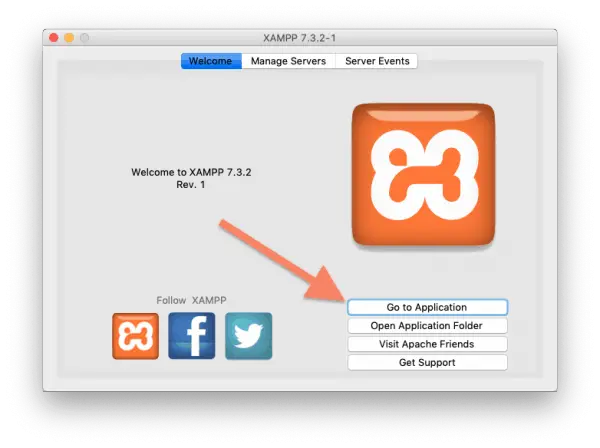
With the MySQL Database and Apache Web Server running, click "Go to Application" on Mac or "Admin" on Windows.
That will take you to http://localhost/dashboard/ or you can go there directly by typing it into your browser.
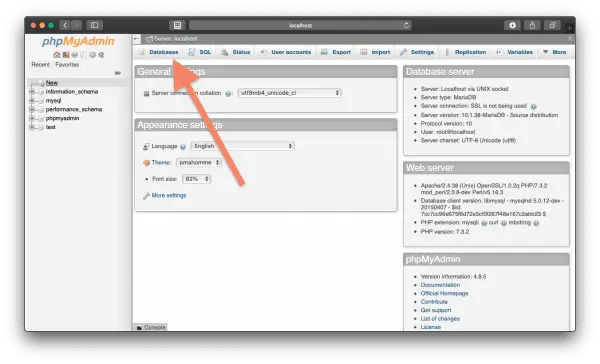
Click "phpMyAdmin".

You'll be logged into phpMyAdmin.
If you get an access denied connection error, see this post on how to fix it.
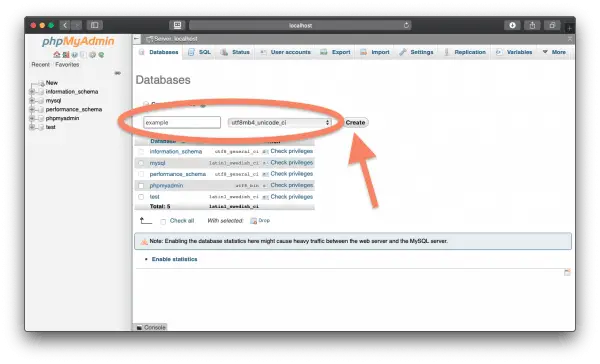
In the top tab, click "Databases".
Name your database something obvious (for this example I'm using "example"), set the language to utf8mb4_unicode_ci and click "Create".
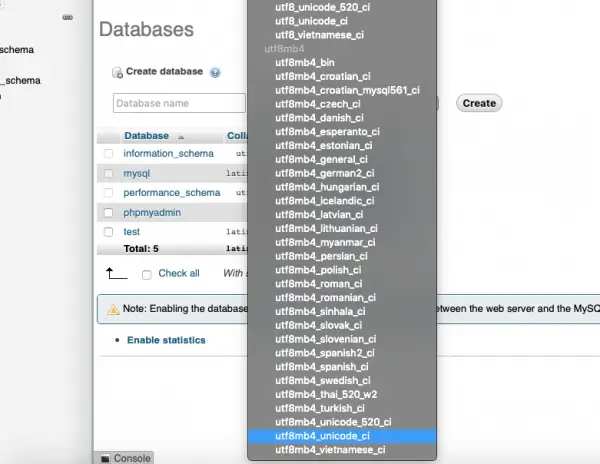
The language dropdown is pretty large. The one we want is pretty much at the bottom.
Process for HeidiSQL
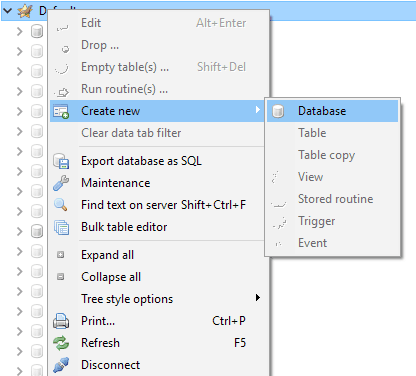
If you're running HeidiSQL (common with MariaDB installations), create a new database by right-clicking on the top entry (mine is "Default"), hover over "Create new" and select "Database".
If you can't select "Database", then you've right-clicked on the wrong area, probably another database.
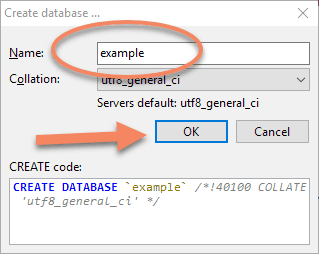
Give your database a unique name, then click OK
Create a new folder in htdocs
We need a place to store the WordPress files.
Go to where you've installed XAMPP. Mine is in c:/xampp/
If you're on a Mac, it will likely be in Applications/XAMPP/xamppfiles/
Open the /htdocs/ folder.
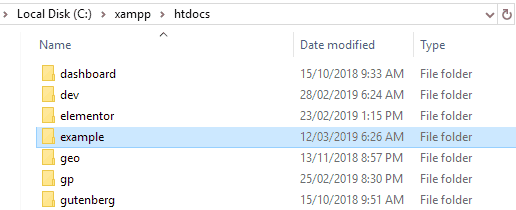
Create a new folder called whatever you want for this project. I like to keep the name of the folder the same as I used for the database. This makes managing a ton of local installs much easier.
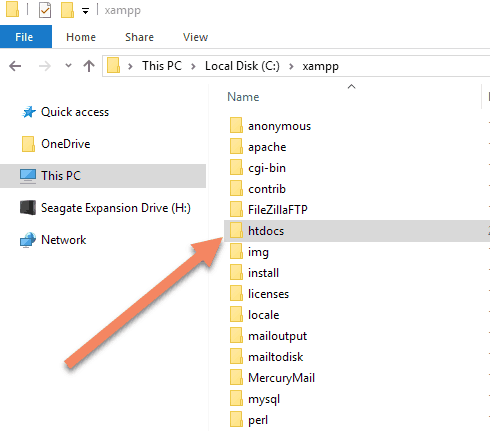
I've called this folder /example/.
Add the files to the folder
This is where the process differs between installing from a backup or installing fresh (click to skip to the relevant sections).
Fresh WordPress install
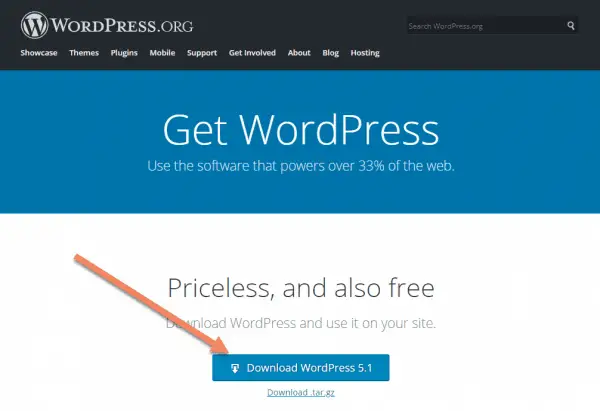
Download WordPress to the folder
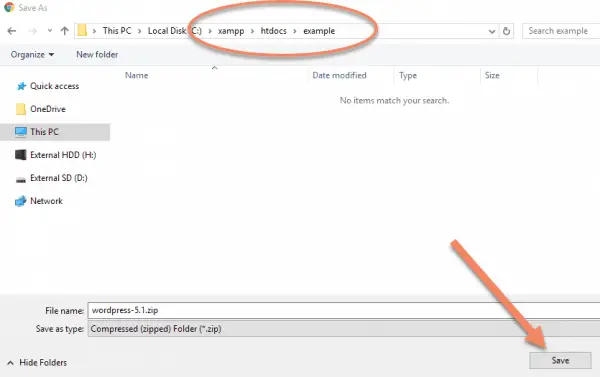
Go to WordPress.org and download the latest version of WordPress.
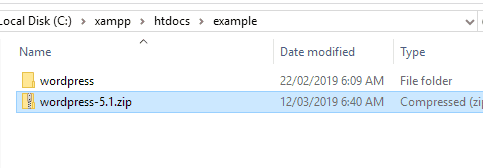
Save the WordPress zip file in the folder you created for this site.
Once that's downloaded, unzip it.
Mac will usually automatically unzip the file for you.
If you're on Windows, you should be able to use Extract All... or use 7-Zip (download it for free here), like I have in the example.

It will take a minute or two to unzip the files.
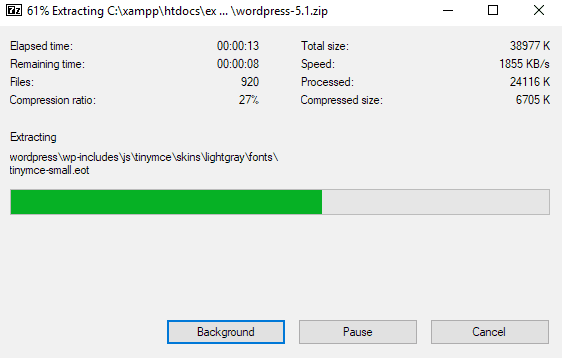
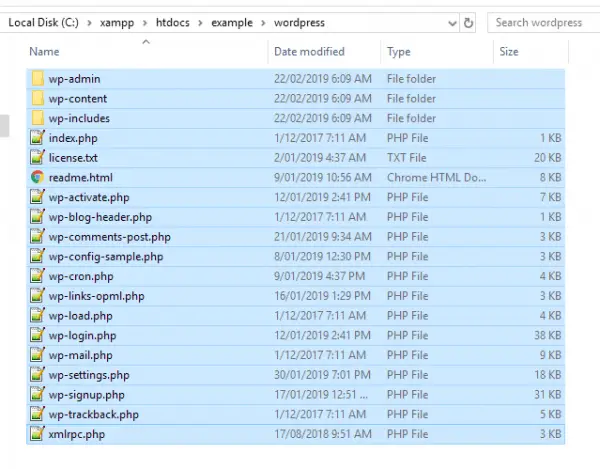
When it's finished, you'll likely have the zip file and a folder called /wordpress/.
If you want WordPress to run in http://localhost/example/wordpress/ then you can leave it where it is.
More likely you want to run it from http://localhost/example/. If that's the case, you'll need to move the files from inside /wordpress/ to the /example/ folder.
Go into /wordpress/, copy all the files (CTRL+A on Windows, ⌘+A on Mac), then Cut them (CTRL+X) if you're on Windows or Copy them (⌘+C) if you're on Mac.
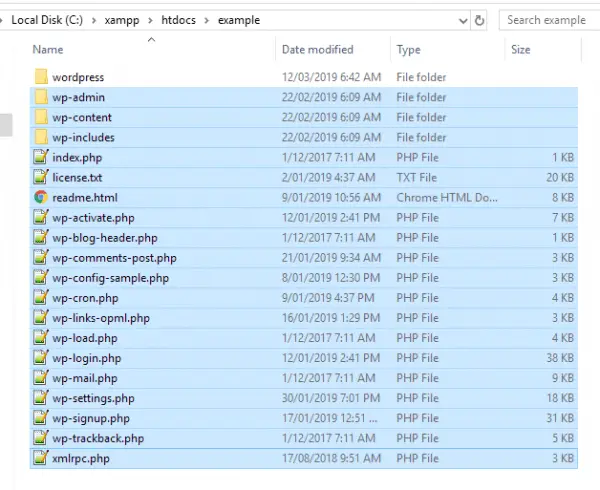
Navigate to the main folder for your installation (here we're using /example/).
If you're on Windows, Paste the files with CTRL+V.
If you're on Mac, Move the files with ⌘+Option+V. Or just click and drag in Finder.
Then you can delete the /wordpress/ folder.
Run The 5 Minute Installer
Now we're done with the files, it's time to setup WordPress.
In your browser, go to http://localhost/example/ replacing example with the name of your folder.
You'll be redirected to the setup config URL as you see in the screenshot.
Choose your language, then click "Continue".
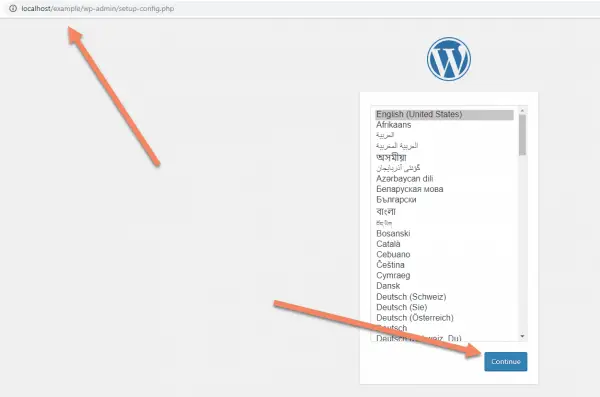
Click "Let's go!"

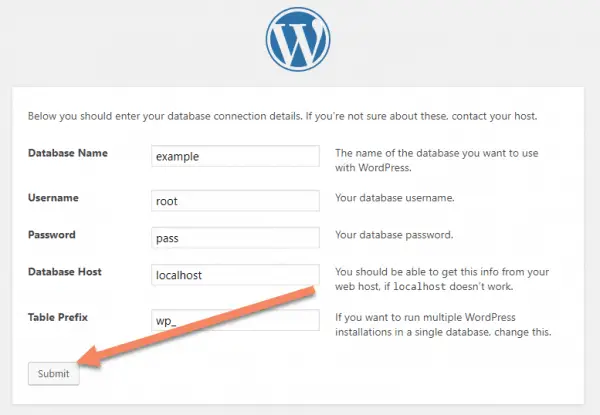
You'll see a screen with the details of your database. This is what you setup in step 2 above.
You'll generally only need to change the Database Name, Username and Password.
The Username and Password are the ones to access your database. The ones to login to the website will come later.
Click "Submit".
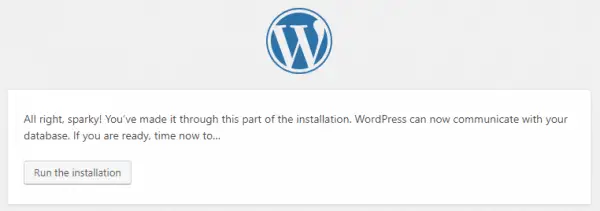
You should see a screen confirming everything is well. If not, you might have the wrong database credentials, or you might have incorrectly spelled the database name.
Click "Run the installation".
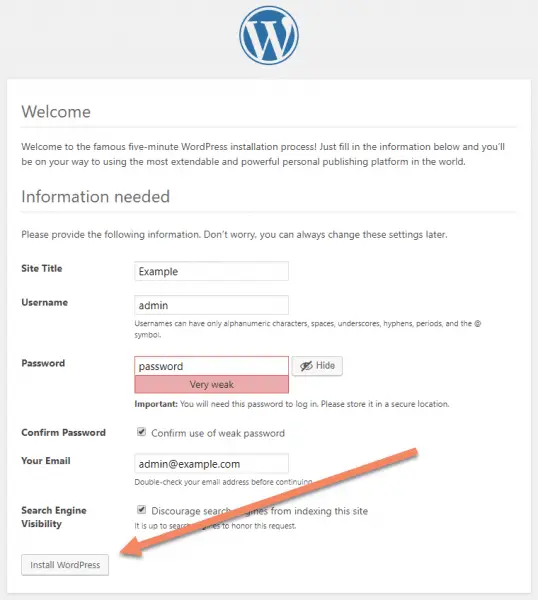
You should next see a screen where you can enter the information about the new WordPress site.
Enter all the details as you see fit.
Because this is a local installation, you don't need to worry too much about login security. If someone can access your computer, they're going to be able to bypass any WordPress security here anyway.
I like to have the same login details (not shown here) for all my local installations. That way I don't have to store different usernames and passwords for all my test sites.
I usually check Discourage search engines from indexing this site mainly so I don't have to think about this step when I initially launch it live.
Once you're happy, click "Install WordPress".
If everything's ok, you'll see a "Success!" message with a button that will take you to the login page.
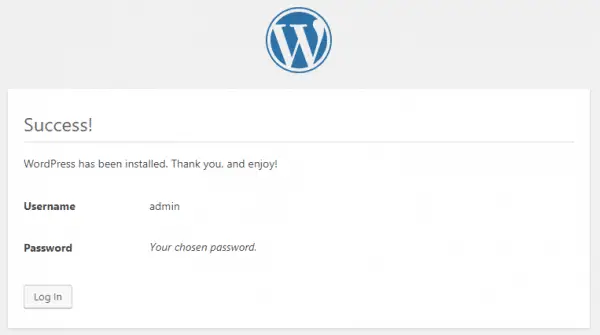
Either click the "Log in" button or go to http://localhost/example/wp-login.php (replacing /example/ with your folder name).
Login with the credentials you created above.
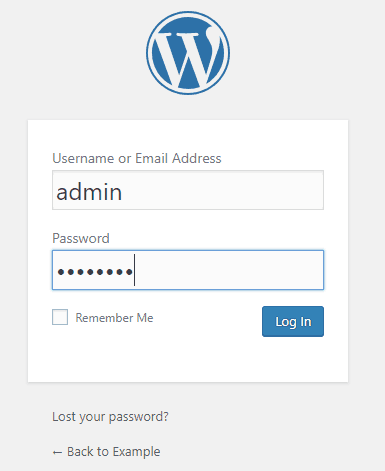
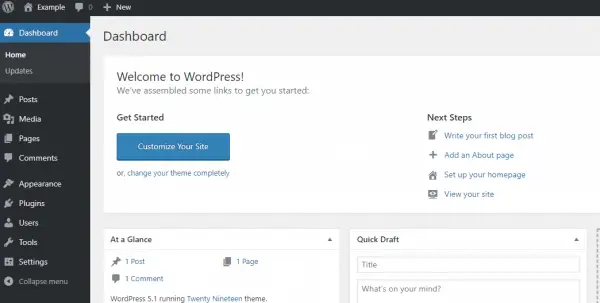
And just like that, WordPress is running on your computer!
Installing from a backup (copying an existing website)
To install a website on XAMPP that you've copied from another website, I recommend using Duplicator or BackupBuddy (get it here).
For this tutorial, I'll be using Duplicator.
I've got a whole tutorial on how to migrate a website using BackupBuddy if you want to use that. You can skip the section on creating a new database, because we've already done that in this tutorial.
Make a backup of the existing site
Start by making a backup of the website. If you don't have Duplicator installed, you'll need to do that first. Just search "Duplicator" in the WordPress Repository.
If you want to backup with another plugin, I cover a few of the main ones in this tutorial.
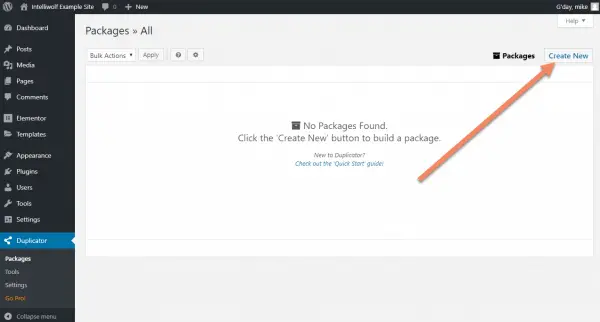
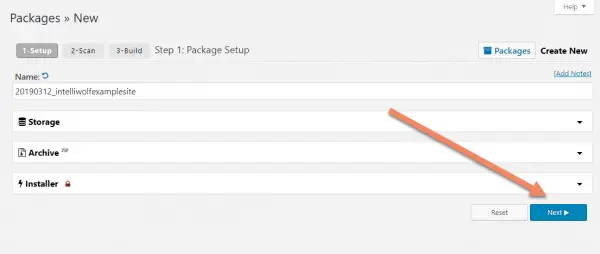
Go to Duplicator->Packages and click "Create New".
Assuming you're happy with all the settings, name and installer password, click "Next".
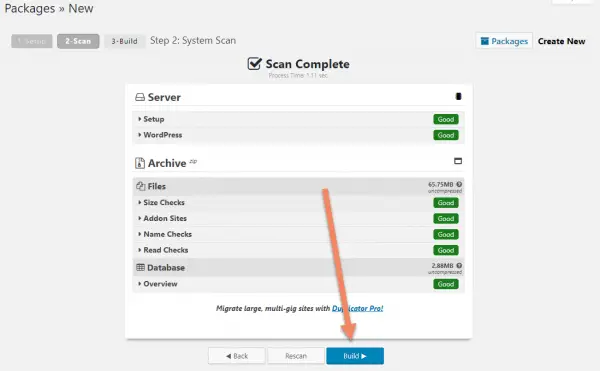
If Duplicator is ready to backup, click "Build", or fix any issues.
If you run into any issues, check out my complete Duplicator backup guide here.
Copy backup files to folder
For most backup options, you just need to add the installation files to an empty folder and run the backup.
When Duplicator is finished running, you'll need to download the Installer and the Archive.
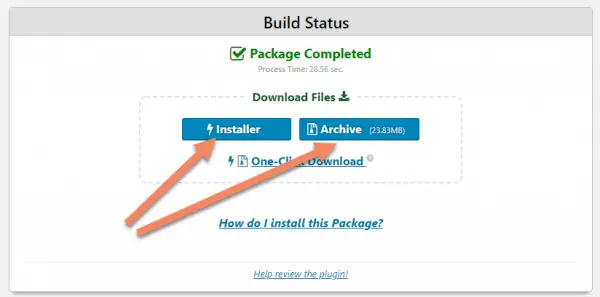
Save the files to the folder you created earlier.
Alternatively, save them to your backups folder for the project and copy them into this folder. The reason you might do this is because the backup files will be deleted as part of the installation.
Follow the steps for the backup type
If you're using BackupBuddy or Duplicator, all the files you need are contained in the backup.
If you're using All-In-One Migration, setup a fresh WordPress installation first.
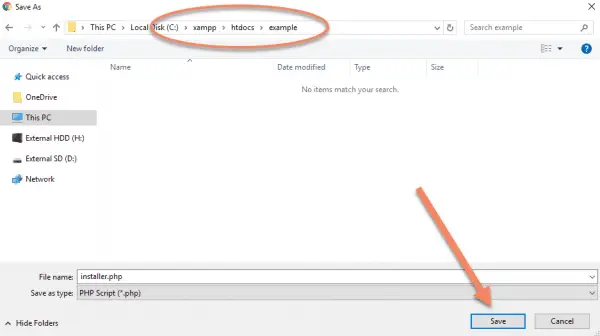
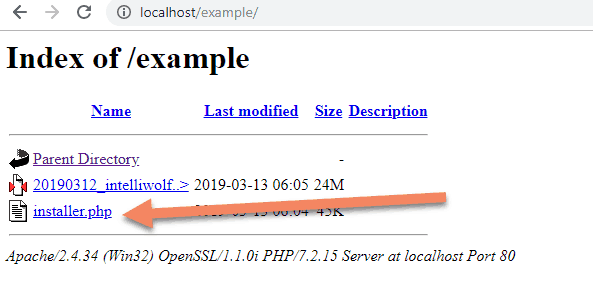
For Duplicator, open http://localhost/example/ in your browser. You'll see the two installation files.
Click installer.php to begin the installation process.
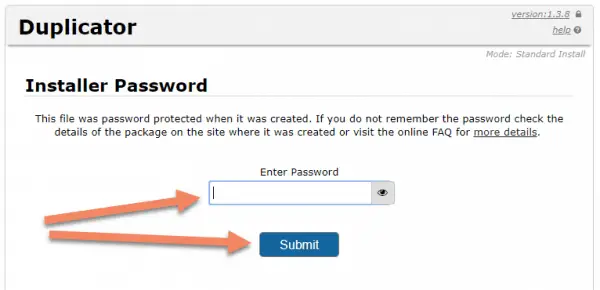
Enter the password you set for the installer. If you have forgotten it, you'll need to go back to the original website, enter a new password and create a new backup.
Click "Submit".
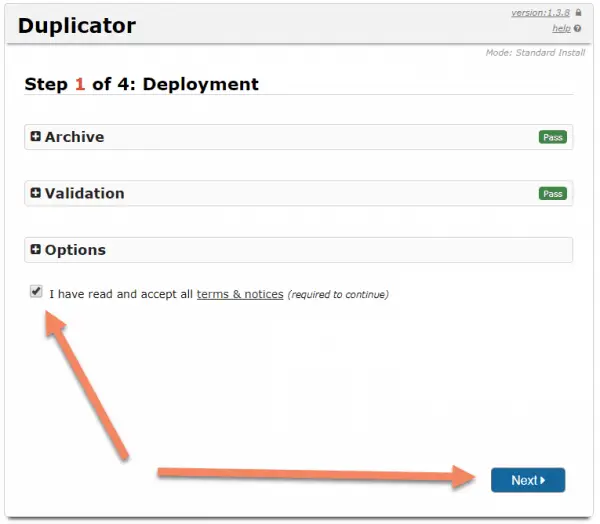
Check the box for I have read and accept all terms & notices. Feel free to read them if you're so inclined.
Click "Next".
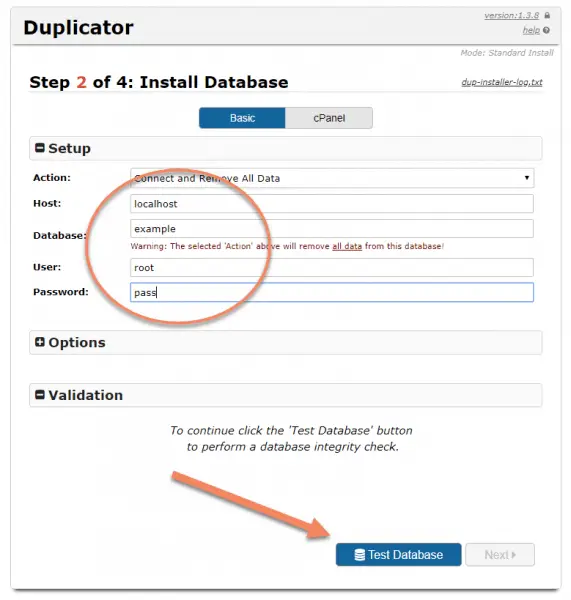
Change the Database field to the database name you set earlier.
Enter the User name and Password for accessing MySQL.
Note: the username and password are for the database, not for the WordPress admin area.
Click "Test Database" to make sure Duplicator can access the database.
Assuming the test passes, the "Next" button will become clickable. Click "Next".
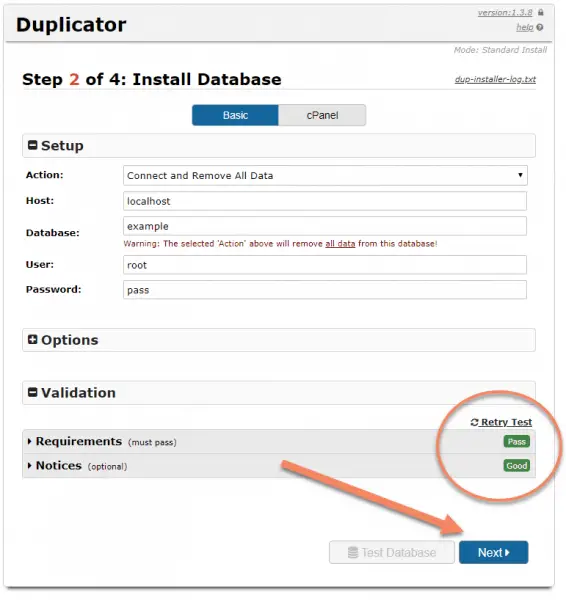
You'll get a warning that Duplicator is just about to wipe that database. Make sure the database under Name is the correct one.
Click "OK".

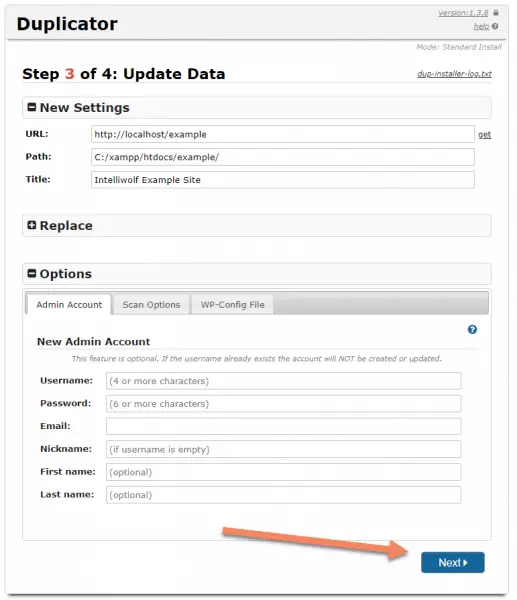
I like to add my default local WordPress username and password at this point.
Note: the username and email fields must not exist in the site you took as backup. Otherwise no new account will be created, the existing account won't be changed and you'll spend half an hour in frustration.
Click "Next".
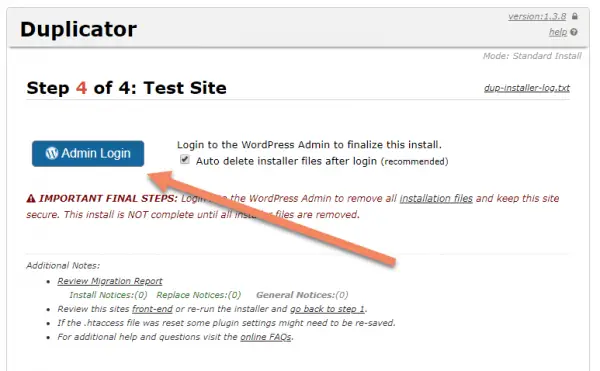
Make sure Auto delete installer files after login is checked. It should be checked by default.
Click "Admin Login" to finish the installation process.
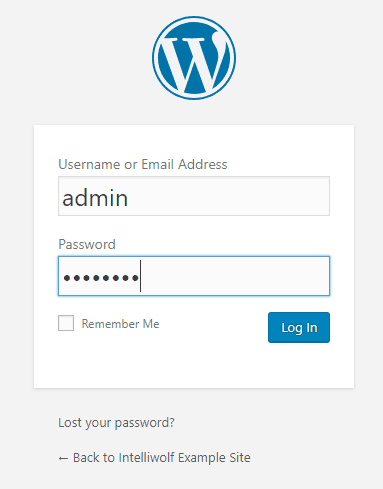
Login using either an account that existed on the original site, or the account you setup a few steps ago.
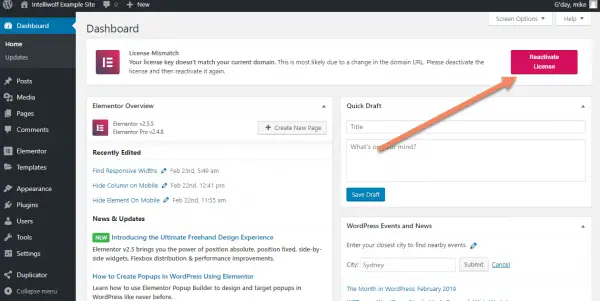
Be sure to relicense any plugins that need it, like Elementor.
That concludes the tutorial. You now have WordPress setup on your local computer in XAMPP ready to develop to your heart's content.

It's about time someone showed the installation process from a Duplicator backup....Thanks, Just what I needed! Ray