With PHP 5.6 reaching the end of support recently, now is a good time to write a refresher on how to update to a more current version.
How to update the PHP version on cPanel:
- Take a backup of all the sites on the server
- Log in to cPanel
- Look under Software for "PHP Selector" or "PHP Manager"
- Choose the domain to update
- Change the PHP version
- Click "Update", "Apply" or "Save"
- Check the sites are still running
I'll go through some of the more common hosts below, but this is the basic process if the host is running cPanel.
If you're on a dedicated server, running Parallels or some other server software, the process will be different.
For the rest of the examples, I'll assume you've taken a backup of all the sites. In fact, whenever you are going to make any changes to a site, you should always take a backup first.
Skip to the relevant host:
How to update PHP on SiteGround
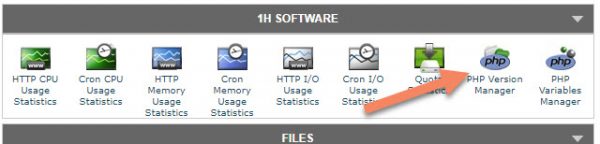
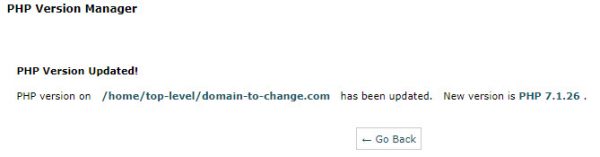
Log in to the SiteGround cPanel, scroll down to 1H Software and click on "PHP Version Manager".
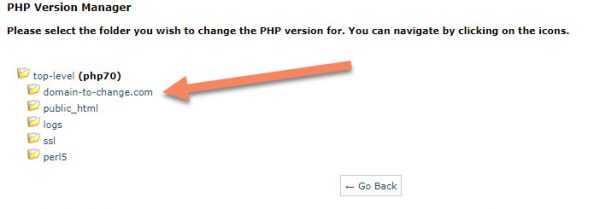
Look for the domain you want to change. You may have to click through the folder structure a bit to find it.
Select the PHP version you want to change to, then click "Save".
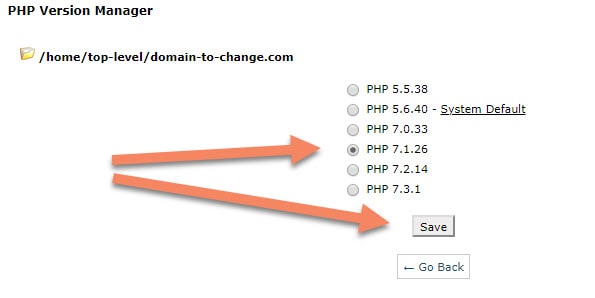
You'll see a message confirming PHP has been updated.
How to update PHP on HostGator Shared Hosting
This applies to all three HostGator Shared Hosting types (Hatchling, Baby or Business plans).
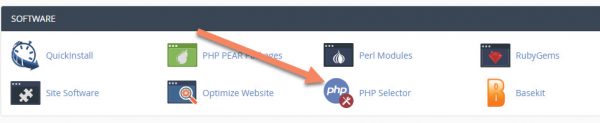
Log in to your HostGator cPanel. Scroll down to Software and click "PHP Selector".
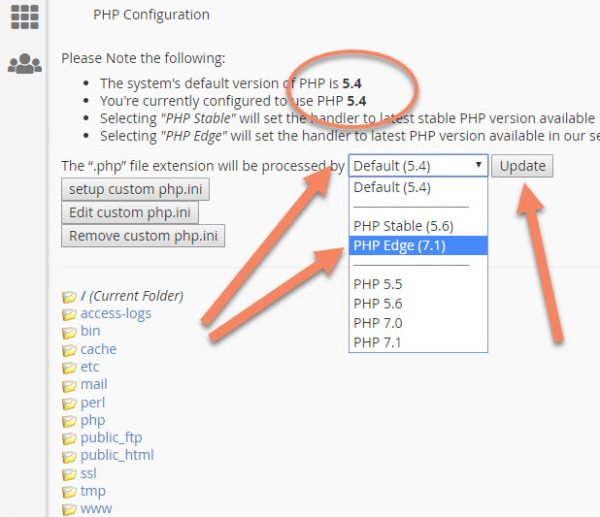
You'll see what the system default is and what version you're running. Ignore the system default. Just make sure you're running one of the more recent PHP versions. As of January 2019, you should be running at least version 7.1.
Select the PHP version you want, then click "Update".
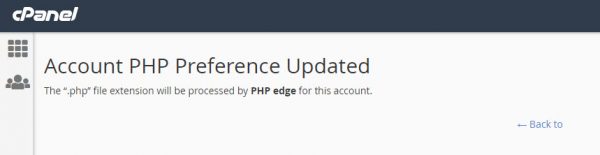
You'll see a screen confirming the PHP preference has been updated.
How to update PHP version on GoDaddy Shared Hosting
Log in to GoDaddy, scroll below your domains til you get to Web Hosting. Find the hosting you want to update. Click "Manage".

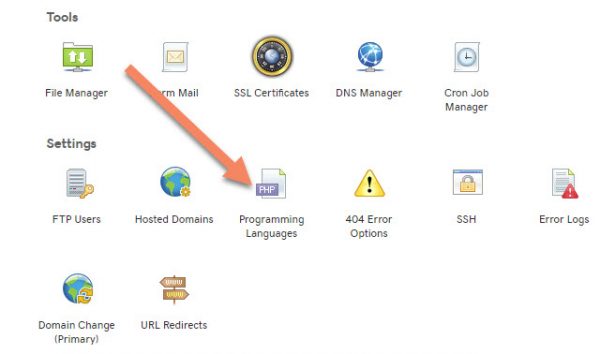
Scroll down to Settings and click on Programming Languages.
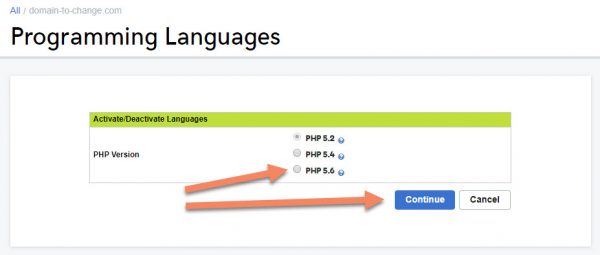
Select the PHP version and click "Continue". Unfortunately, the latest version available is 5.6. Come on GoDaddy, it's 2019. Lift your game.
You'll be asked to verify the changes. Take note of the warning if you're using a custom php.ini file. That will likely be in the root folder.
If you do have a custom php.ini file, you can proceed with this next step. Just go and change the file after.
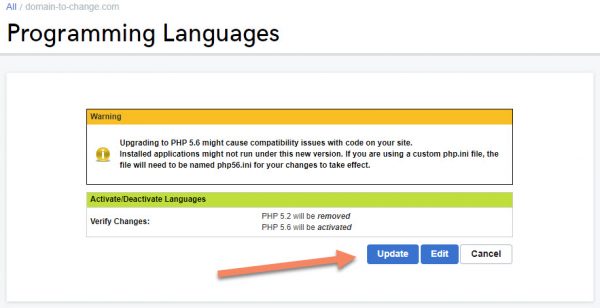
There is no further update screen. Once you click "Update", you'll be taken back to the main hosting panel.
How to update PHP version on HostDime
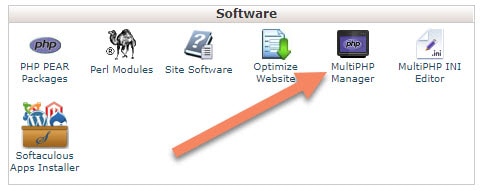
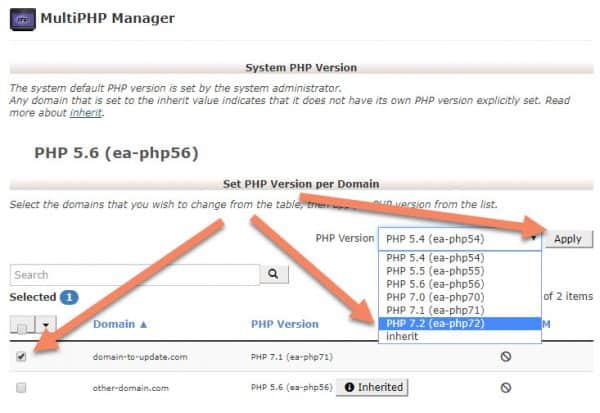
Log into your HostDime cPanel. Scroll down to Software and click on MultiPHP Manager.
Click the checkbox next to the domain or domains you want to update.
Use the PHP Version dropdown to choose your PHP version, then click "Apply".
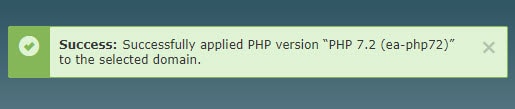
Once the PHP version has finished updating, you'll see a green Success hover in the top right of your screen.
How to update PHP version on OVH in cPanel
Log in to your OVH cPanel, scroll down to Software and click on MultiPHP Manager.

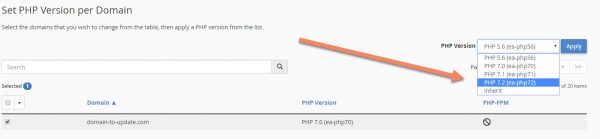
Select the domain or domains you want to update, select the desired PHP version and click "Apply".
If you don't see the PHP version you want, go to the OVH WHM section to configure that.

You'll see a Success hover confirming you have updated the PHP version.

How to enable the latest PHP version in WHM on OVH
This will apply to most WHM systems. I'm just using OVH for this example because I'm very familiar with it.
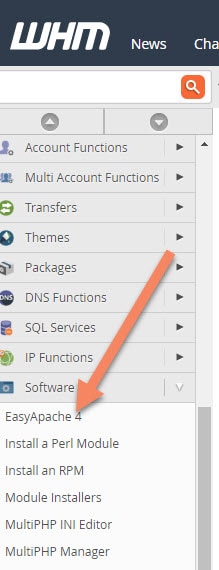
Log into WHM. Scroll down to the Software accordion and select EasyApache 4. Note this version number might be different in your installation.
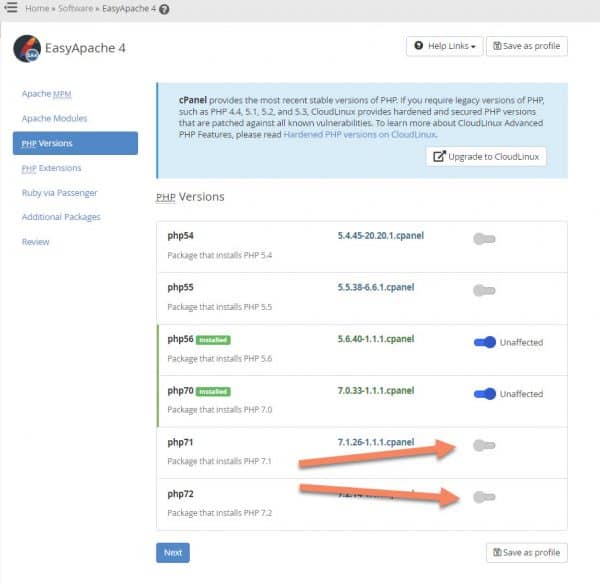
Click "Customize" next to the Currently Installed Packages.

Toggle the PHP versions you want to enable.
I wouldn't disable any of the current versions yet. Add new versions, update and check your domains, then uninstall older versions when you're sure you no longer need them.
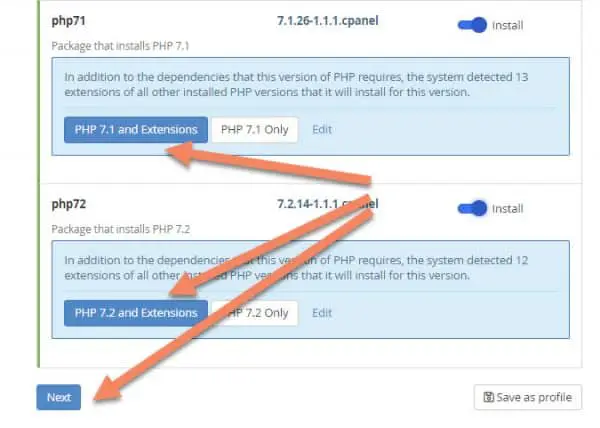
You'll be asked whether you want to install the relevant PHP version and its extensions, or just the PHP version. In most cases, you'll want to do both PHP and its extensions.
Click the relevant buttons, then click "Next".
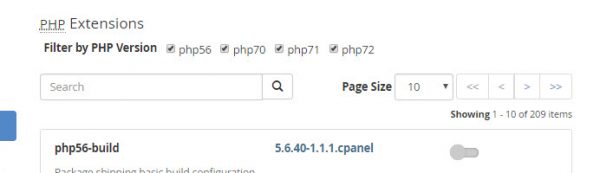
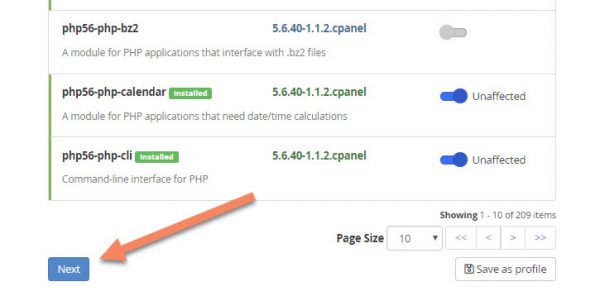
You'll go through several screens. Check what packages are going to be installed if you're doing anything custom.
You can filter by the PHP versions you're installing, to make it easier to check which extensions are going to be installing.
Once you're happy, just proceed through the rest of the screens.
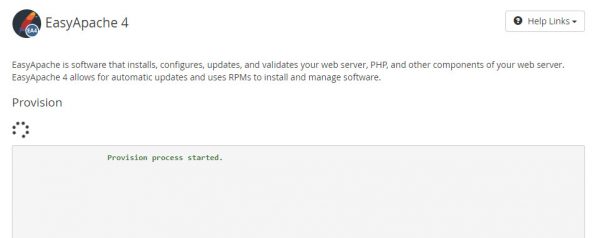
At the end, you'll come to a giant screen showing all the changes that are going to be made. If you're happy with that, click "Provision" at the bottom.
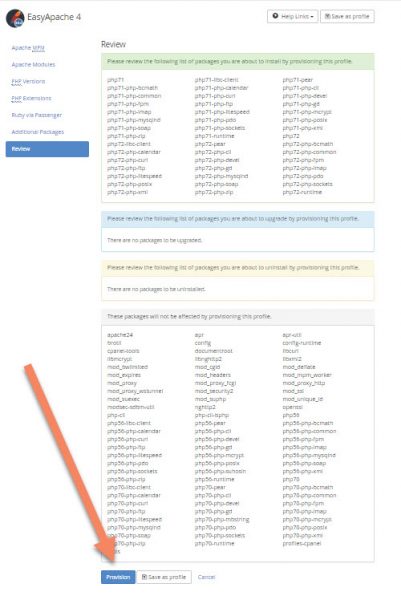
It will take a few minutes for EasyApache to install everything. Wait til it's complete.
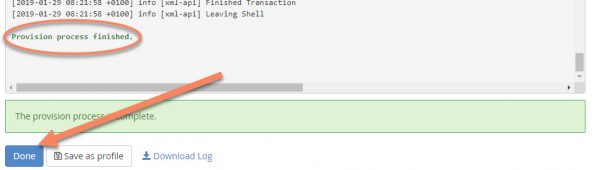
You'll see a line that says "Provision process finished". Then click "Done".
You can now go back to the OVH cPanel and you'll see the new PHP versions available.

Excellent Thanks
Exactly what I needed. Many thanks!
I am searching on google how to update php version on cpanel and I find your post. Hopefully it will work.
Thank you!