I've previously written on how to make a sticky header in Elementor Pro. Now we're going to take that to the next level.
We're going to create a sticky header that is transparent over a video background:

And when the user scrolls down, the header turns into a sticky header with a white background.

You will need Elementor Pro installed and active to do this.
How to add a transparent sticky header to Elementor
- Create a new header from the theme builder
- Add the header rows
- Style the hero row with padding and a video background
- Add and style the site title and menu
- Change the header to sticky and add styling
- Publish your new header
Let's go through it step by step.
Create a new header
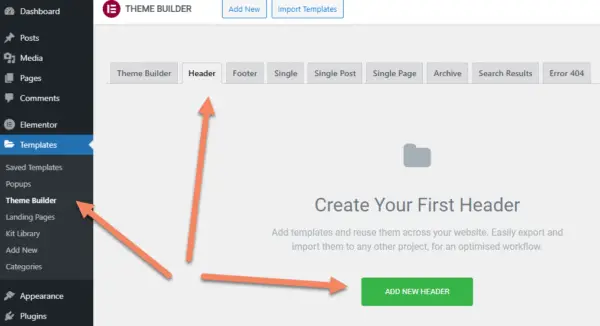
With Elementor Pro installed and active, under Templates in the sidebar, go to Theme Builder.
Select the Header tab and click "Add New Header".
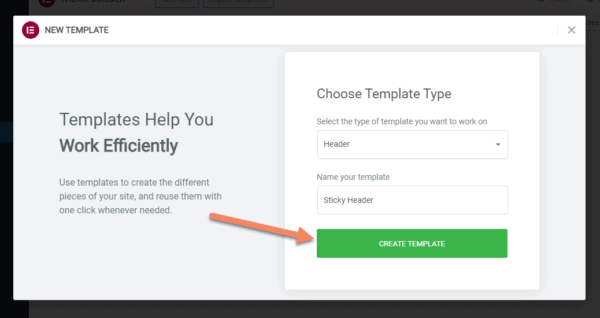
Name your template something relevant.
For this tutorial I named it "Sticky Header".
Click "Create Template".
Add Header Rows
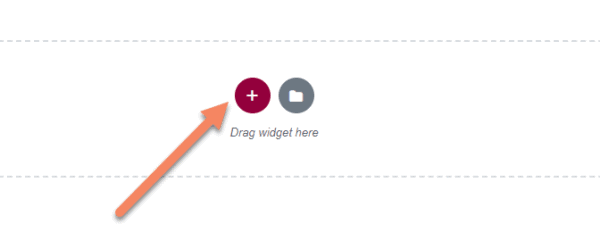
You can set the header up however you want, but to do it the way I demonstrated at the top of this tutorial, you'll need to add two rows.
Click the plus button to get started.
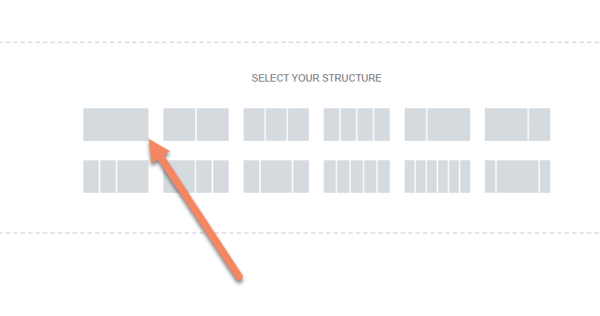
I chose the 1/3, 2/3 structure so I could put the site title (or logo) in the left and the menu in the right.

Under that, you'll add a row for your hero. I'm just using the page title, but do a different structure if you want a more complex hero. Perhaps you might put a sign up box on the right and the title on the left.
Style the hero row
Click on the row selector for the second (hero) row.

Click on the Style tab and change the background to video.
You could also do this as an image or even a solid color.
The video I chose for this tutorial is https://www.youtube.com/watch?v=SKaIkbgyhU8 which is a crackling fire.
You can adjust the start time and how long it will run.

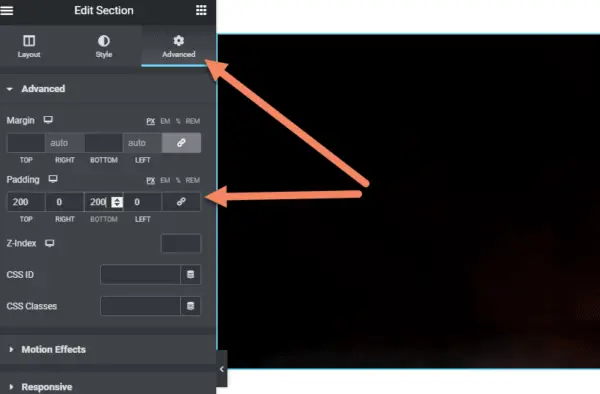
While still in the row settings, click on the Advanced tab and change the padding to 200px top and 200px bottom. You'll need to unselect the Link Values first.
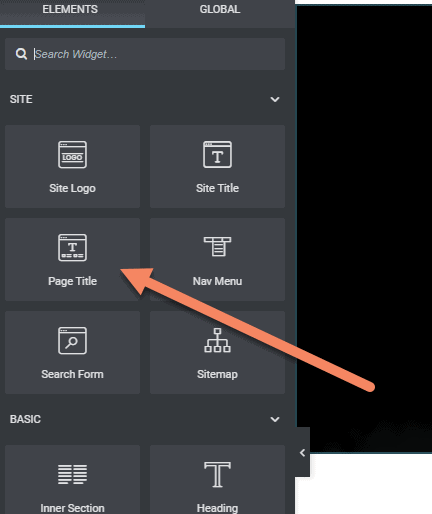
Now we add the page title. I did it this way so I can use this on multiple pages, but if you're only using it on one page, you might just add a regular heading widget here.
If you're adding a more complex hero layout, this is the time to do it.
To add the page title, drag the Page Title element to the hero row

You should see the page title appear. Style it however you'd like. For this, I set the text color to white and changed the font-weight to 400.
The changes you'll need to make depend on your theme and how you have your globals set.

Add and style the Site Title and Menu
The next step is to setup the header that will become sticky.
Drag either the Site Logo or Site Title element into the left column of the header.
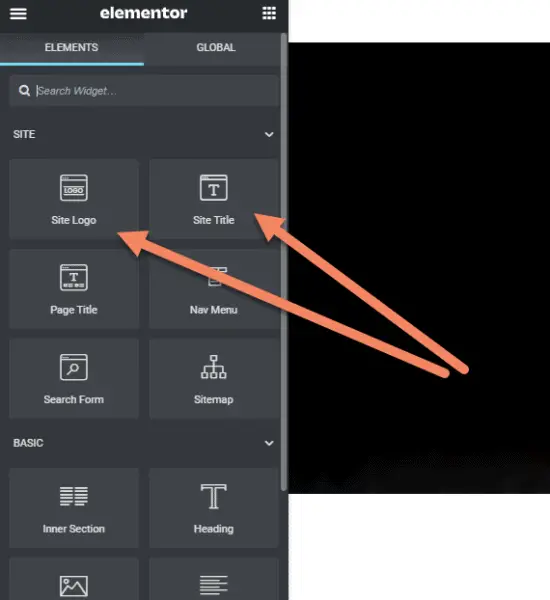

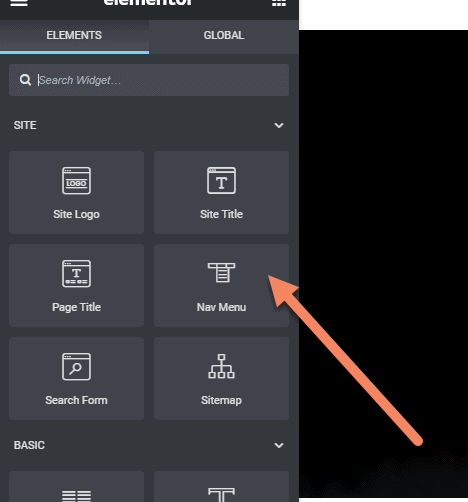
Drag the Nav Menu element into the right column of the header.

You will probably need to change the styling. I changed the alignment of the menu to right and changed the text colors on the site title and menu to white.
Change the header to sticky
Go into the Section Editor for the header row.

In the Advanced tab under Motion Effects, change Sticky to "Top".
By default, the header will be sticky on all sizes. Generally you only want it sticky on desktop, so remove Tablet and Mobile.

Now we want to move the hero row up so it touches the top of the screen.
Go to the Advanced section of the Advanced tab for the hero row.
You could measure the height of the header row and base it off that, or just hit the down arrow on the hero margin until it touches the top.
Make sure you unlink the margins first.
There are other ways of setting this up, like with absolute positioning, but we're going for the easiest way right now.
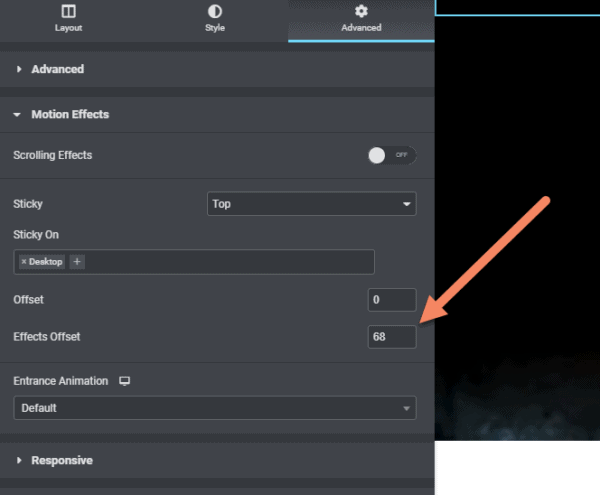
When you're happy with the negative margin on the hero row, take note of it. In this example, it's 68px. Add that amount to the top padding, to keep everything even.

Edit the header row.

Go back into the Advanced tab and change the Effects Offset to 68px.
In the same tab, go down to Custom CSS and add this code:
selector {
  transition: background-color .5s ease;
}
selector.elementor-sticky--effects{
  background-color: #fff;
}
selector.elementor-sticky--effects >.elementor-container {
  min-height: 68px;
}
selector.elementor-sticky--effects .elementor-heading-title,
selector.elementor-sticky--effects .menu-item .elementor-item {
  color: #222;
}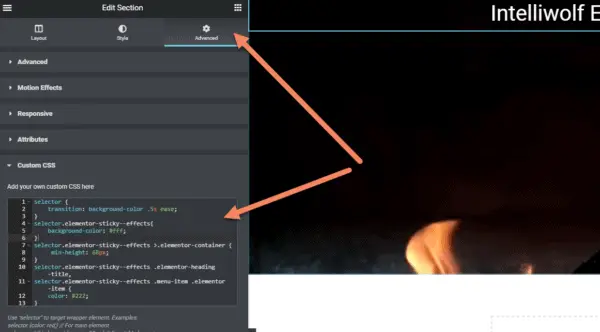
This sets up the transition from transparent background with white text to a white background with dark grey text upon scroll.
Note the min-height of 68px before the change takes place. This should be the same as you set for the negative margin of the hero.
The last item in the code sets the Site Title and menu to #222. You can split them out if you need them to be different colors. If you use a logo rather than the site title, you might get rid of the first selector.
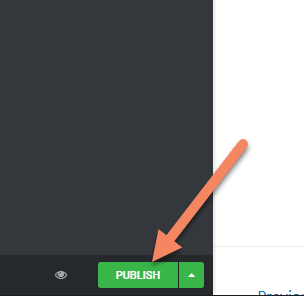
Publish and Display the Header
Now that everything is looking the way you want, click "Publish" on the bottom of the Elementor sidebar.
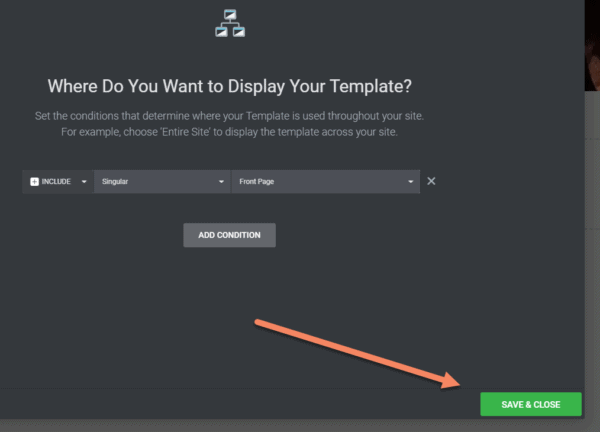
Add a condition for where you want it to display.
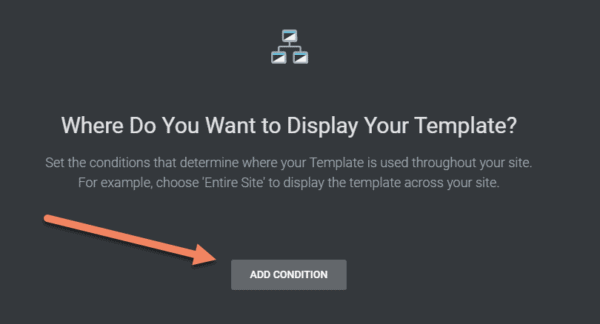
Play around with the conditions until the header displays where you want it to.
In this case, I just wanted it to appear on the home page, so I set it to Singular -> Front Page.
Click "Save & Close".
Now you have a header that's transparent on page load.
And which changes to a sticky header with a background color when the user scrolls.